Auto-webinars are a convenient tool that allows you to attract new customers without the need to individually configure and conduct repeated broadcasts.
Depending on your audience, you can host auto-webinars at different times.
For example, it may be convenient for some users to watch auto-webinars in the evening, on weekdays or, conversely, on weekends only.
Launching auto-webinars at a predetermined time is not always suitable for users.
In this case, you can attract an audience by organizing frequent launches.
In the case of frequent launches, two methods of attracting an audience are usually used:
Advertising with the appeal 'Visit the webinar right now' — by following, the visitor will be taken to the upcoming launch.
Communication with the client — for example, the manager finds out a time convenient for the client and sends him a link to start at the right time.
GetCourse auto-webinars can be held at different frequency in order to adapt as much as possible to the needs of your audience.
How to create an auto-webinar and configure its basic parameters, you can learn in the article.
The launch of an auto-webinar on GetCourse is possible in various modes:
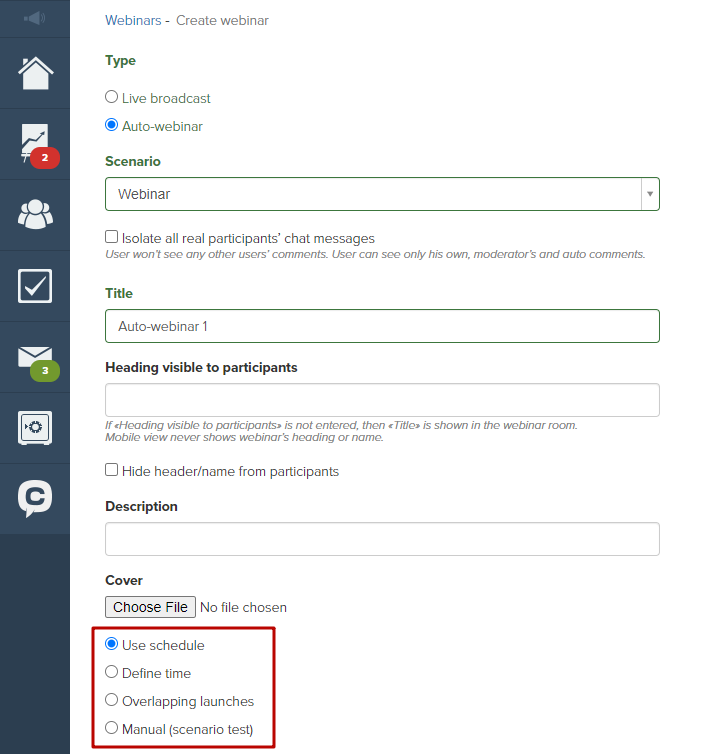
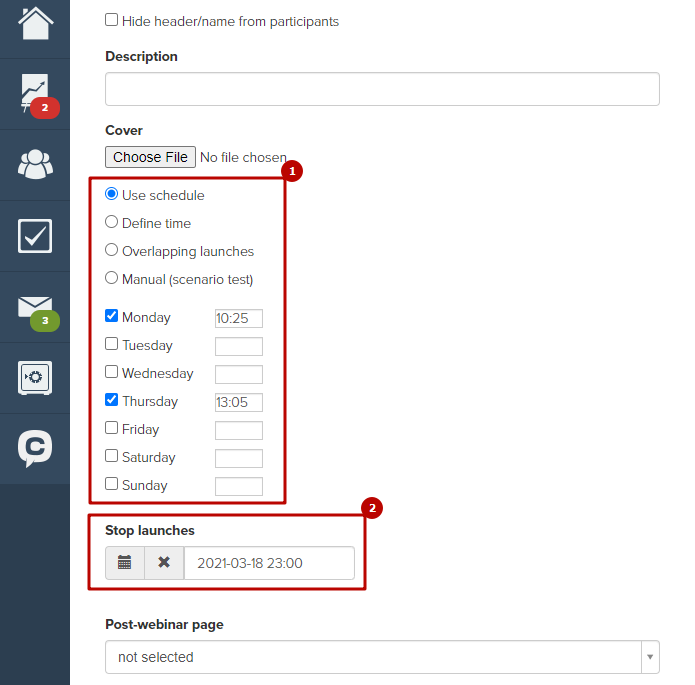
By schedule, once a day
You can specify how many times a week and at what time your auto-webinar will start.
In this case, you can run the auto-webinar no more than once a day.
Mark the desired days and time (1) and indicate when to stop the launches (2).
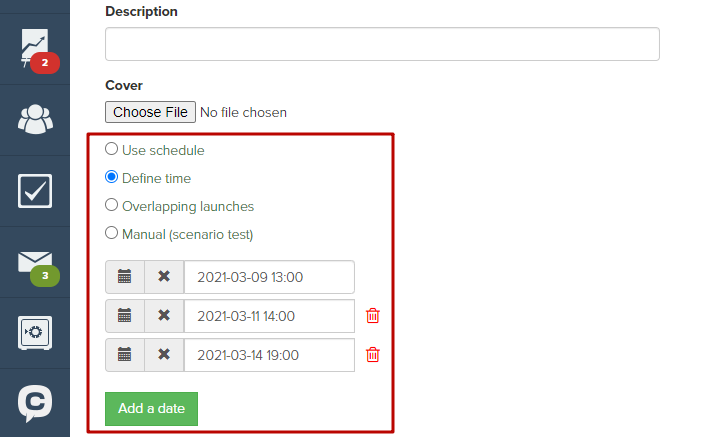
At the indicated time
Auto-webinars launches can be scheduled in advance for specific days.
You can specify several options — including several times a day.
Please note: the next launch can be scheduled no earlier than 30 minutes after the previous one, since the same webinar room is used.
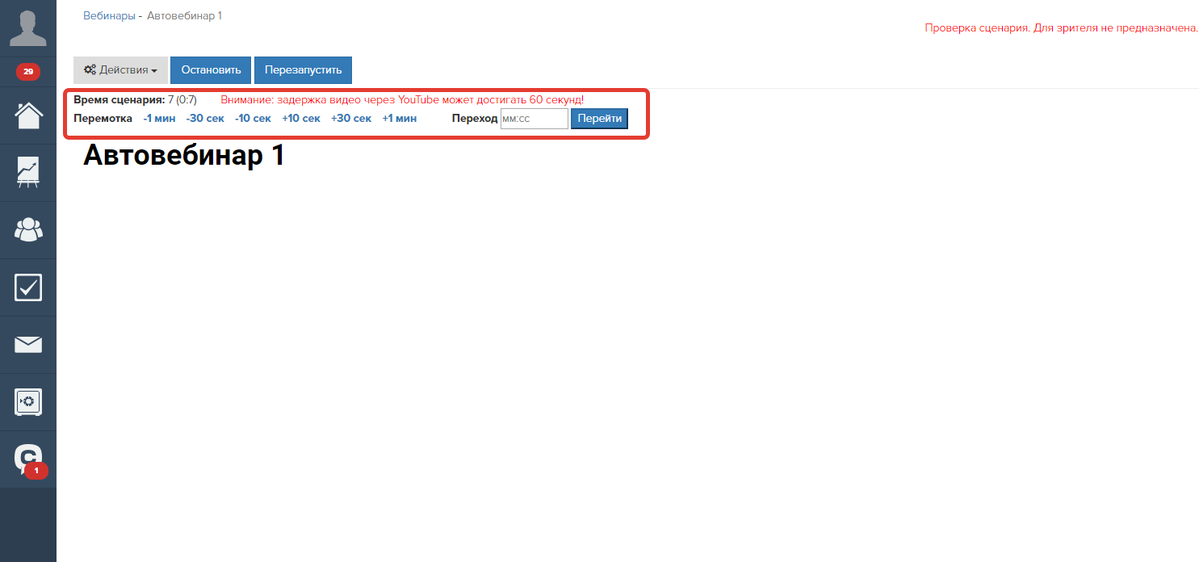
Manually (script check)
This mode is used to verify and debug the script. In it you can check whether the settings for the slide switch time correspond to the timing of the video, whether all the necessary actions are added, and so on.
Manual review mode is not intended to be shown to viewers.
During a manual start, you can rewind the auto-webinar time or go to the specific moment.
Please note: before starting, we recommend that you view the entire auto-webinar from start to finish through the eyes of the viewer. This will allow you to see in advance and eliminate the possible shortcomings of the script.
Frequent simultaneous launches
Select this setting if you want to run several auto-webinars per day simultaneously.
Frequent launches may overlap in time, with the broadcasts being streamed independently of each other.
Let’s get a closer look of setting up frequent launches in more detail:
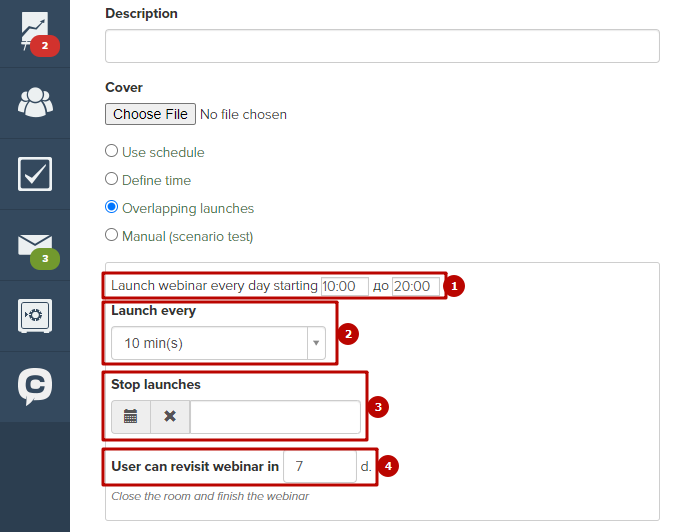
1. Range of starts
The system will start auto-webinars in the specified time range only.
You can, for example, specify only daytime hours and stop launching overnight.
In this example, the first launch will occur at 10:00, and the last — at 20:00.
Please note: Time is set according to your region, if in doubt ask our support, please.
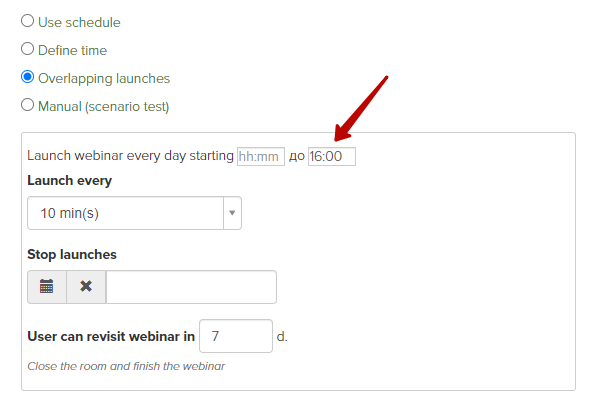
For the settings to work correctly, just specify one of the values.
For example, you can specify only the first value of the range — 10:00.
In this case, launches will take place from 10:00 to 0:00 of the next day.

If you specify only the last value of the range (for example, 16:00), then the first launch will occur at 0:00, and the last — at 16:00.
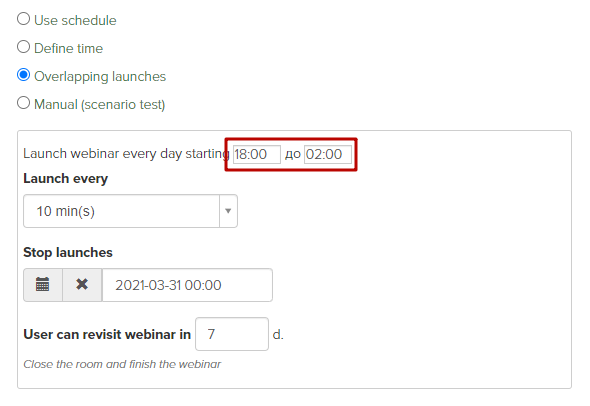
The range of launches can be specified not only within 1 day, but also with the transition to the following day.
For example, if you specify the time from 18:00 to 2:00, then the last launch will occur at 2:00, and then there will be a break in launches until 18:00 of the next day.
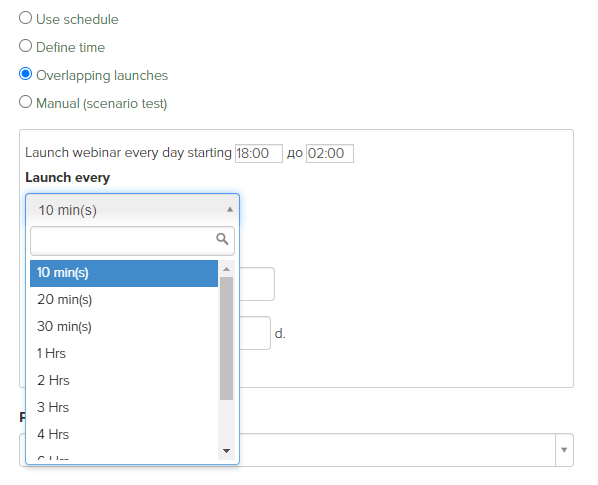
2. Launch frequency
There are breaks from 10 minutes to 12 hours available to be done between launches.
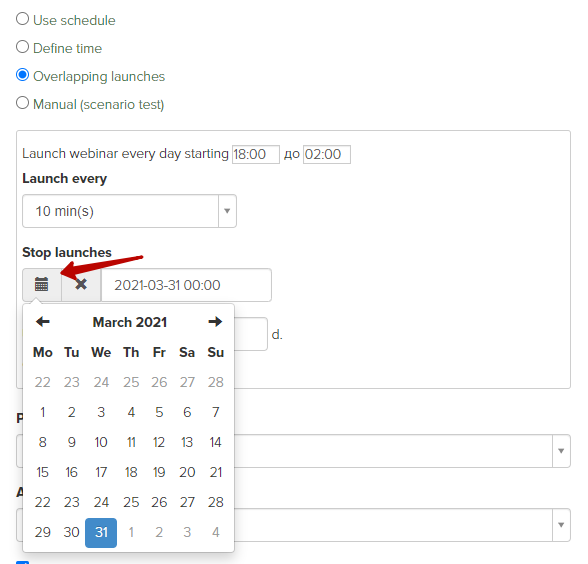
3. Date of launches termination
As with scheduled launches of auto-webinars, in the case of frequent launches, the end date is required. This is required so that auto-webinars do not start indefinitely.
4. Validity of visitor binding
The user who first visited the webinar room becomes bound to the next launch that has not yet started — depending on the time of the visit.
Example: auto-webinars run every 30 minutes from 15:00 to 20:00.
If the visitor comes at 10:00, then he will be bound to the first launch on that day at 15:00.
If the visitor comes at 15:01, then he will be bound to the next launch at 15:30, if he comes at 16:45, then he will be bound to the launch at 17:00 and so on.
If the visitor comes after 20:00, for example, at 20:10, then he will be bound to the first launch of the next day.
Please note: the binding is carried out due to the data stored by the visitor’s browser. If he clicks the link again, but in a different browser, he will be taken to the next upcoming launch.
At the same time, it will be obvious to the user that the broadcast is not streamed live, therefore, we recommend not to hide the fact that the recording is being shown.
The validity period of the binding can be limited.
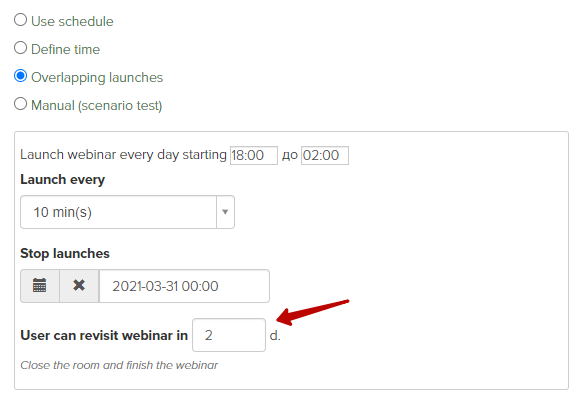
For example, if you specify 2 days, then the visitor bound to the broadcast today at 15:00 can watch it.
If he comes again later, after the event, he will see that the auto-webinar has ended.
The user for two days will see the information that the auto-webinar has ended, after which at the next visit he will be able to bind to another launch and will again be able to watch the auto-webinar.
If you set this value to 0, then the user will be constantly bound to the specified launch and will not be able to get to any other upcoming launch of this auto-webinar.
Different users can see different launches of auto-webinars, depending on when they entered the room when following the link for spectators.
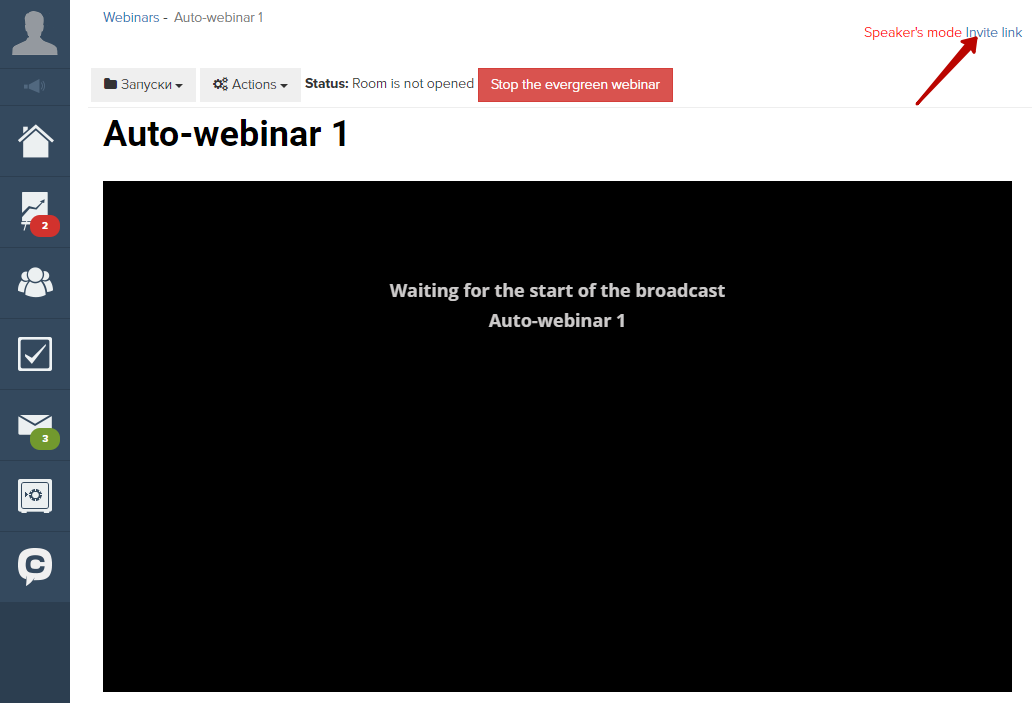
The user can also be given a link to a specific launch. However, the binding will not occur when clicking on this link.
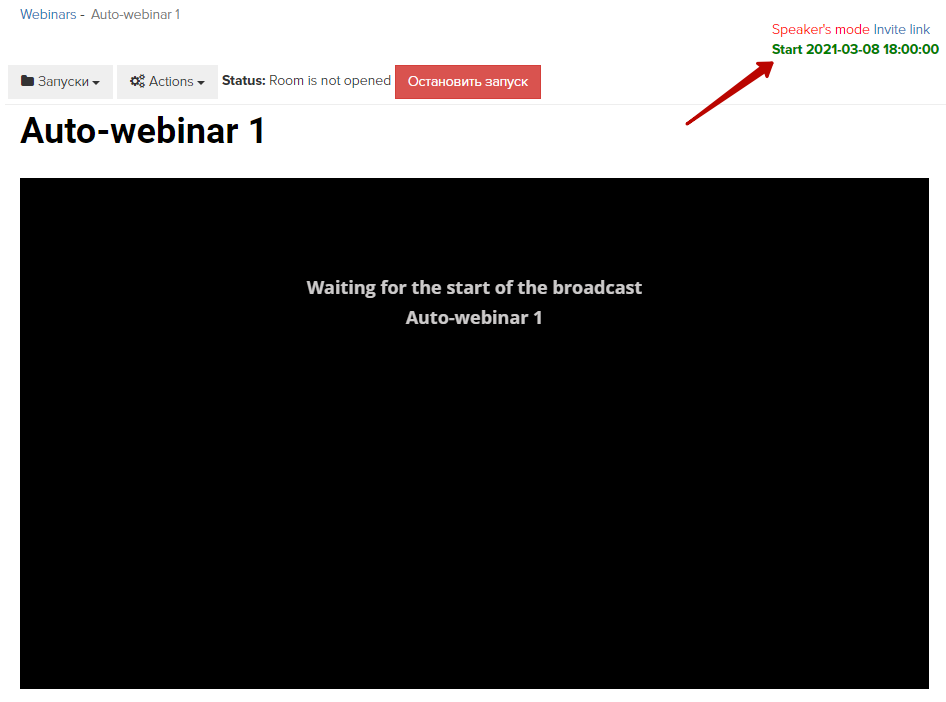
The administrator can go to the webinar room of the current launch, as well as the nearest ones — which were launched up to 2 hours ago or will start in 2 hours.
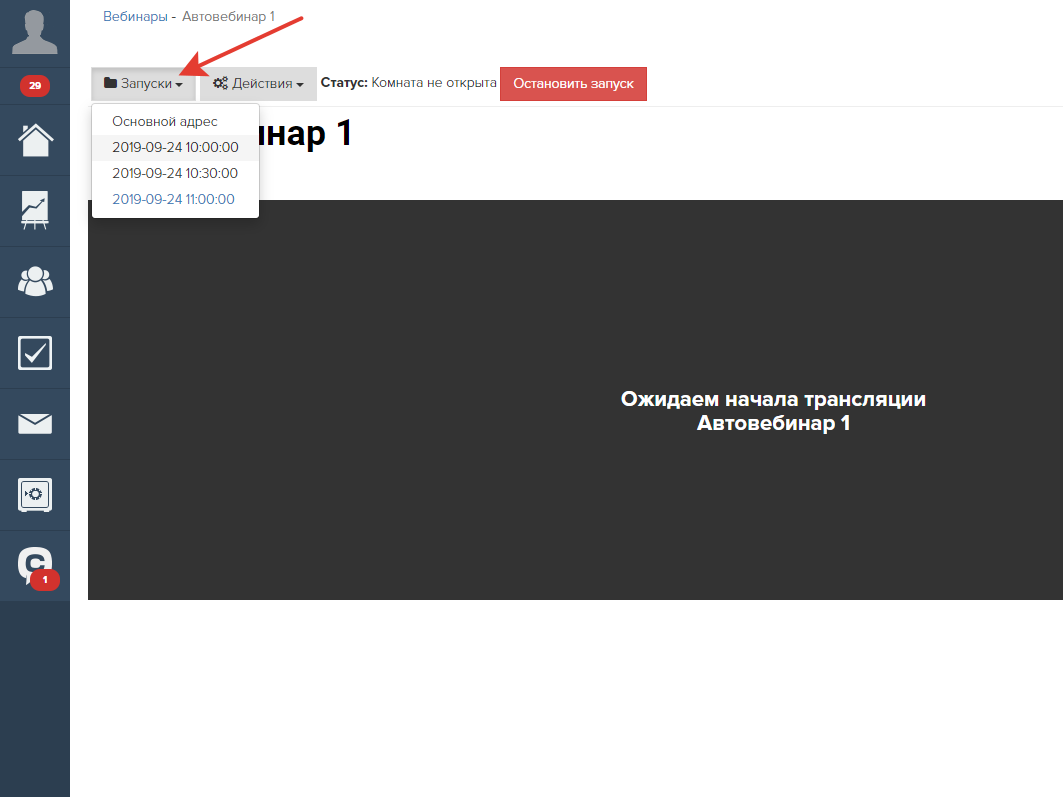
5. Variable to display the date and time of the next launch of the auto-webinar.
By posting information about your auto-webinar on the landing page, you can use the {webinar_start_time} variable.
This variable will show the time of the scheduled launch of the auto-webinar.
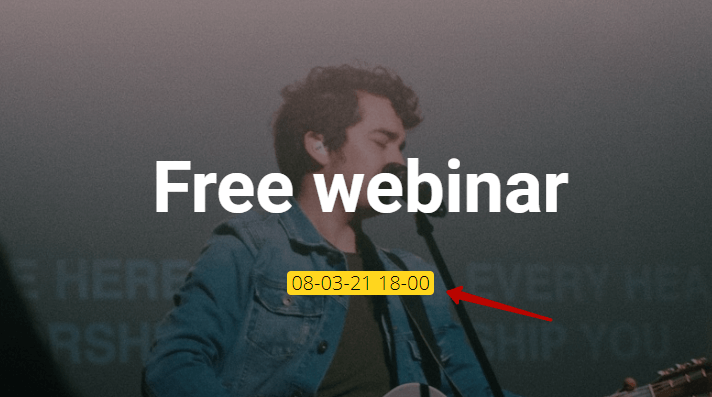
Displaying the date using a variable on the page.
Variable format:
{webinar_start_time id="1312153" format="d-m-y"}
where:
- id — the id of the auto-webinar,
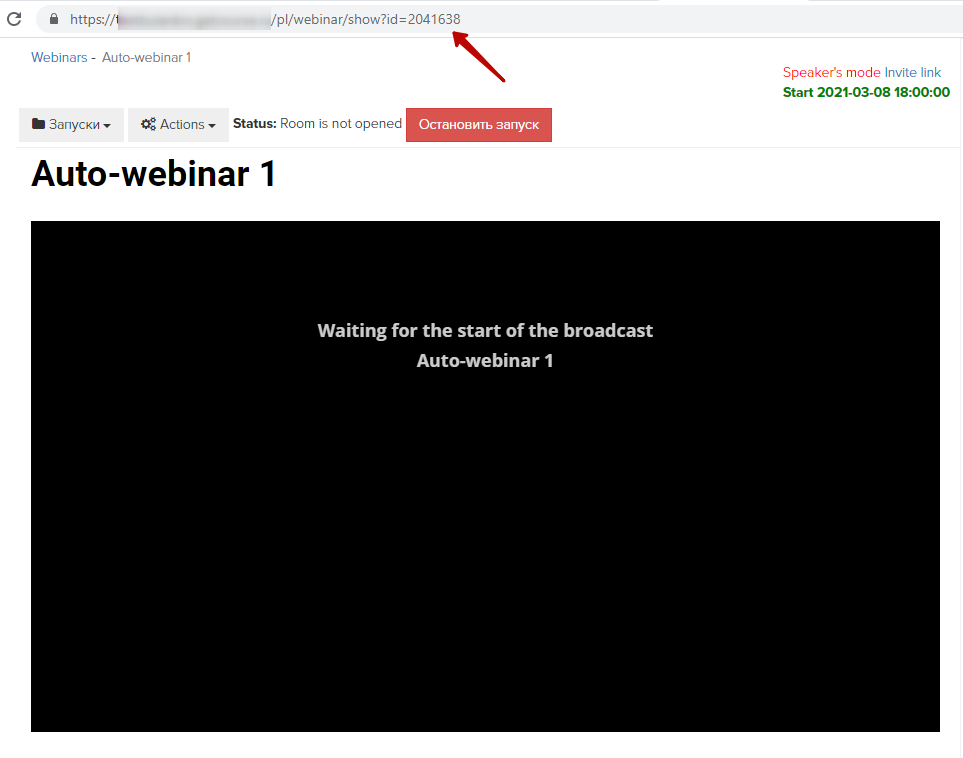
id of the webinar from the address bar.
format — the format of the displayed date/time.
Possible values for the format attribute:
d — day (from 01 to 31),
m — month (from 01 to 12),
n — month (from 1 to 12),
y — year (for example, 19),
Y — year (e.g. 2019),
H — hours in a 24-hour format (from 01 to 23),
G — hours in a 24-hour format (from 1 to 23),
i — minutes (from 00 to 59),
s — seconds (from 00 to 59).
If you do not specify the format attribute, then the full date will be displayed as yyyy-mm-dd hh:mm:ss.
We use technology such as cookies on our website to personalize content and ads, provide media features, and analyze our traffic. By using the GetCourse website you agree with our Privacy Policy and Cookies Policy.

please authorize