Conducting a webinar means not only speaking to an audience online, presenting your material in an interesting way, it also means conducting a certain list of organizational events and settings to achieve maximum effect.
In this article, we’ll look at how to prepare and host two different types of webinars:
Selling webinar. Purpose: to conduct an public/free webinar to sell a product/training or collect a subscribers database.
Private/paid webinar. Purpose: to conduct a webinar where users pay for participation.
How to prepare a free/selling webinar?
The mechanics of conducting a selling webinar has some features:
Registration page (provides information about the upcoming webinar, marks users during registration);
Webinar room with built-in sales elements (buttons, banners or a product page);
Several additional emails reminding you of the time of the webinar.
Let’s look at these features step by step.
1. Creating a registration page
The goals of creating such an intermediate page between users and the webinar room:
User registration. There is an accumulation of your user database, working with which you can obtain loyal users who purchase your products.
Informing users about the upcoming webinar: its description, information about what users will receive by participating, what problems will they solve, date and time of the event.
Segmentation of the database: at the registration stage, these users can be marked with a group (for example, the group «How to grow avocados at home Webinar»), so that it is possible for this segment to make a mailing list with a reminder of the webinar.
The process of creating a page is described in more detail in the article «How to create a page?»
To add registered users to the group (for additional mailings with a reminder), you need to configure the registration form. In addition, we’ll look at a few extra actions for a form handler that you might find useful.

Webinar registration form
We recommend adding the following actions in the form handler:
«Add a user to a group» (then it will be possible to find those users who have registered for this particular webinar);
«Show message» (let the user know how he will receive the link to the webinar — for example, it will be sent by mail);
«Authorize user» (the user will be authorized/logged in immediately after registration and his further movements, including the entrance to the webinar room, will take place as an authorized user);
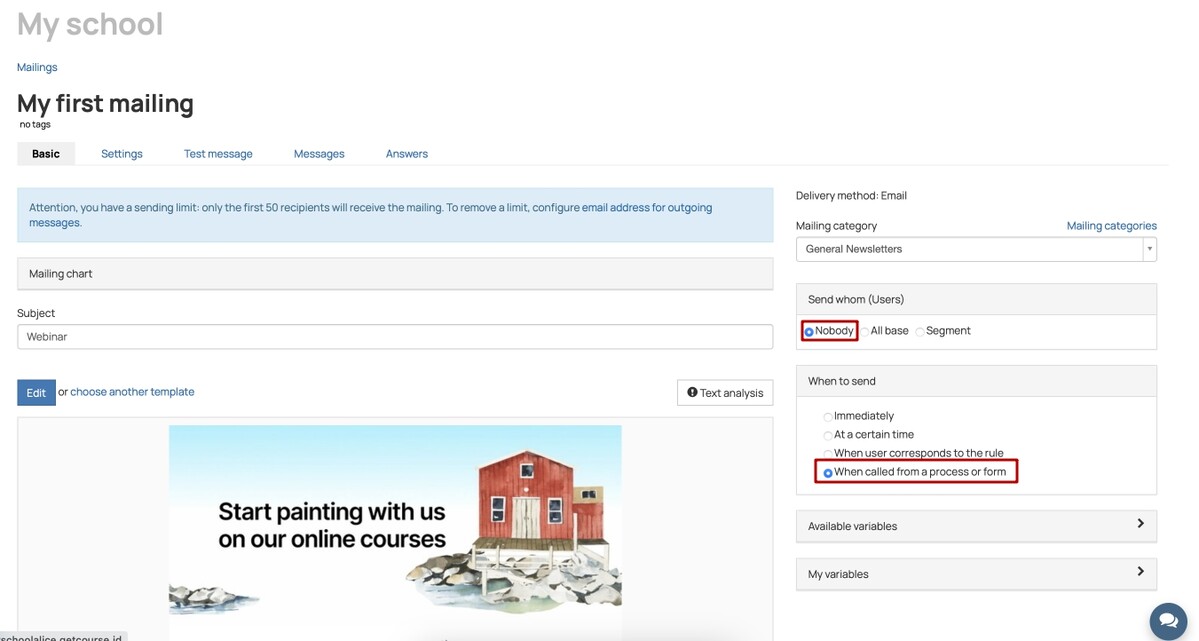
«Send a letter» (you can initiate sending a letter with a link to the webinar directly from the form. Important: this mailing must be in the «Draft» status and the segment and date of sending must not be specified in its settings).
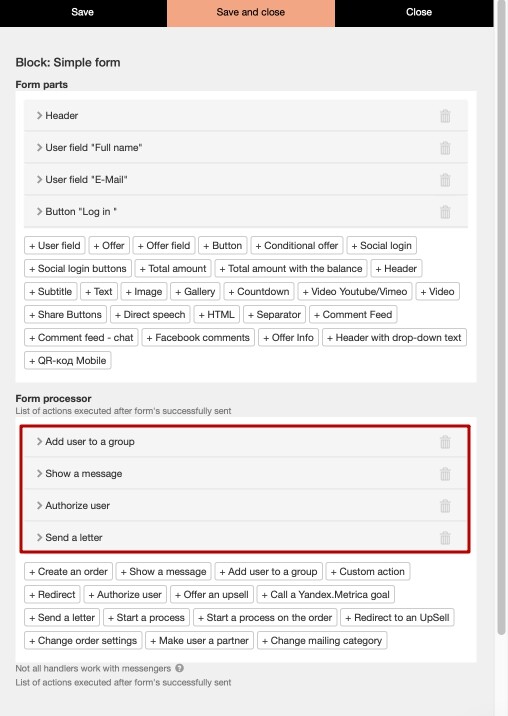
Important: mailing must be in the «Draft» status and the segment and date of sending must not be specified in its settings.
2. Creation of a webinar room
On the GetCourse platform, a webinar can be created in the «Website» — «Webinars» section. This method of conducting a webinar is discussed in detail in the article:
GetCourse webinars.
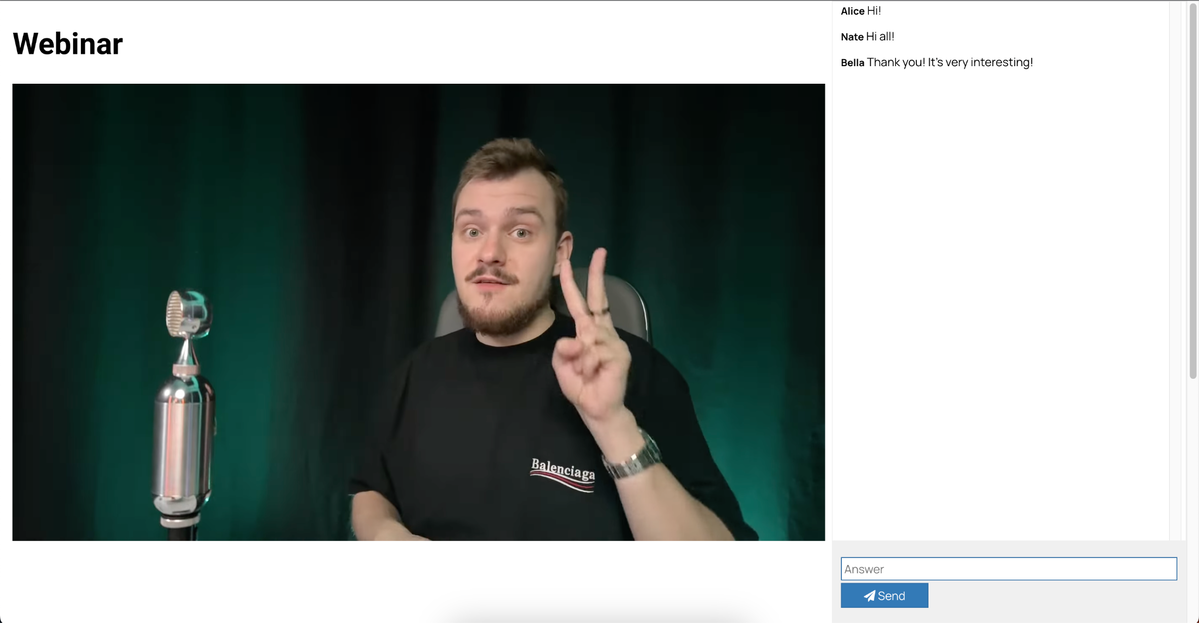
Also, when preparing a webinar, the following articles may be useful:
Setting up a YouTube account and creating a broadcast
3. Preparing a letter with a link to the webinar room
After registering a user for a webinar on the previously created landing page, you need to send him an email with a link to enter the webinar room.
The link to the webinar room itself can be copied after right-clicking on the inscription «Invite link»:
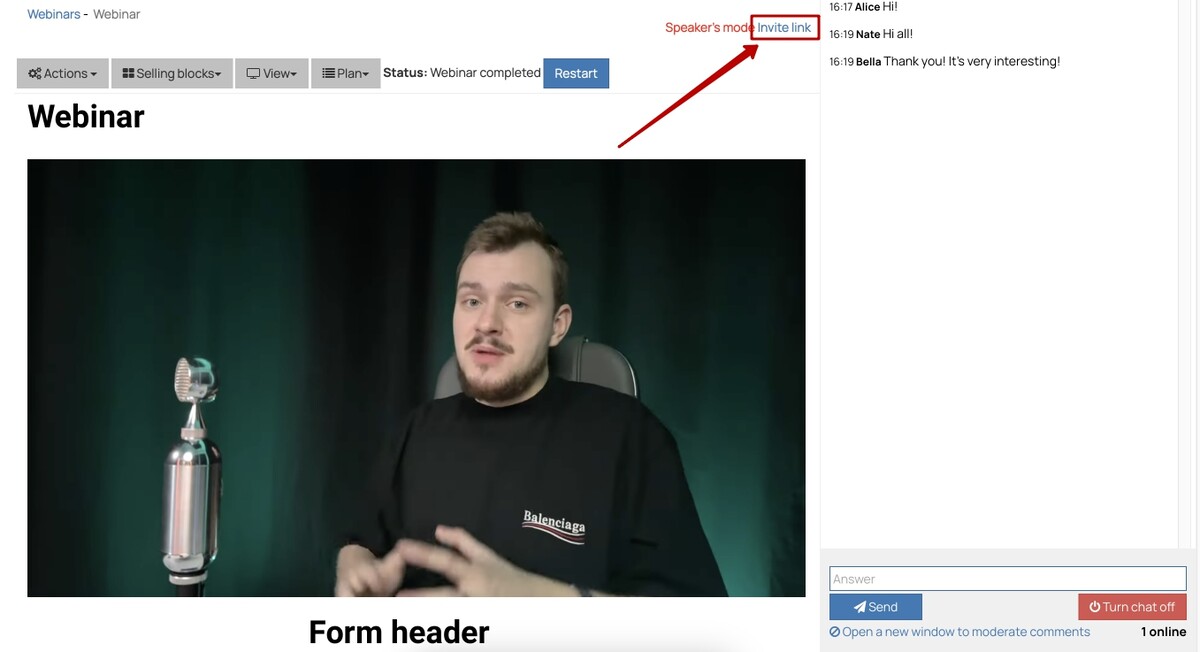
You can send a letter with a link either through the registration form itself, by adding an appropriate action to the form handler, or by setting up the mailing list individually.
Let’s consider the settings for a separate mailing list. When creating, you need to specify the category «General mailings» and the mailing object «Users»:
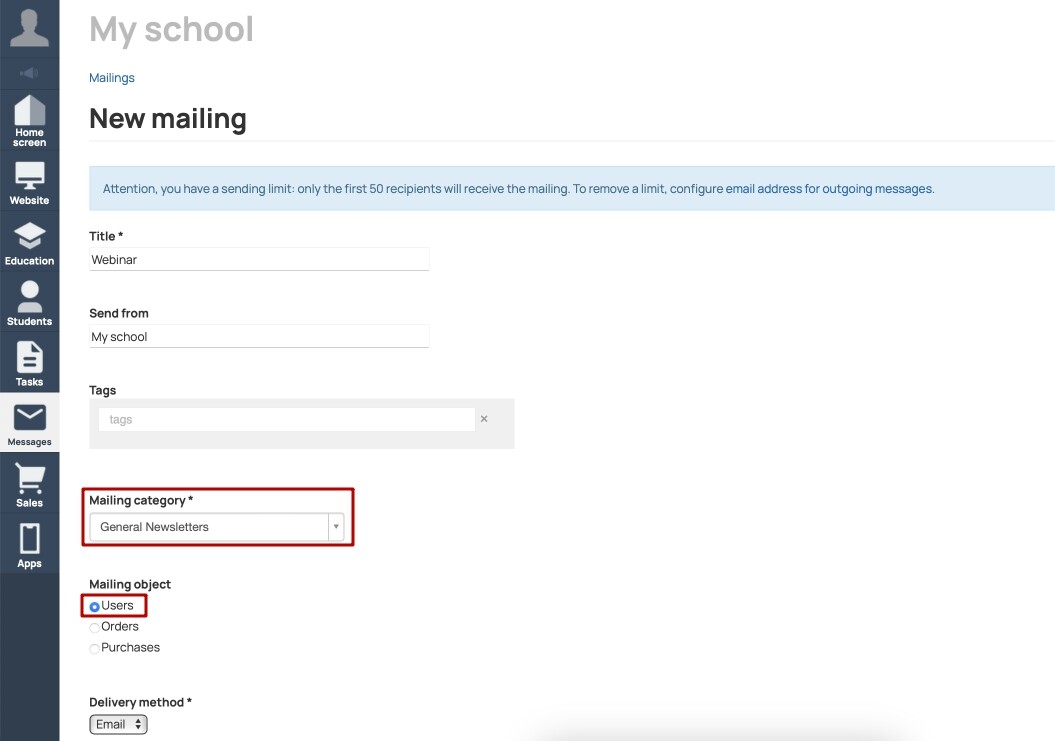

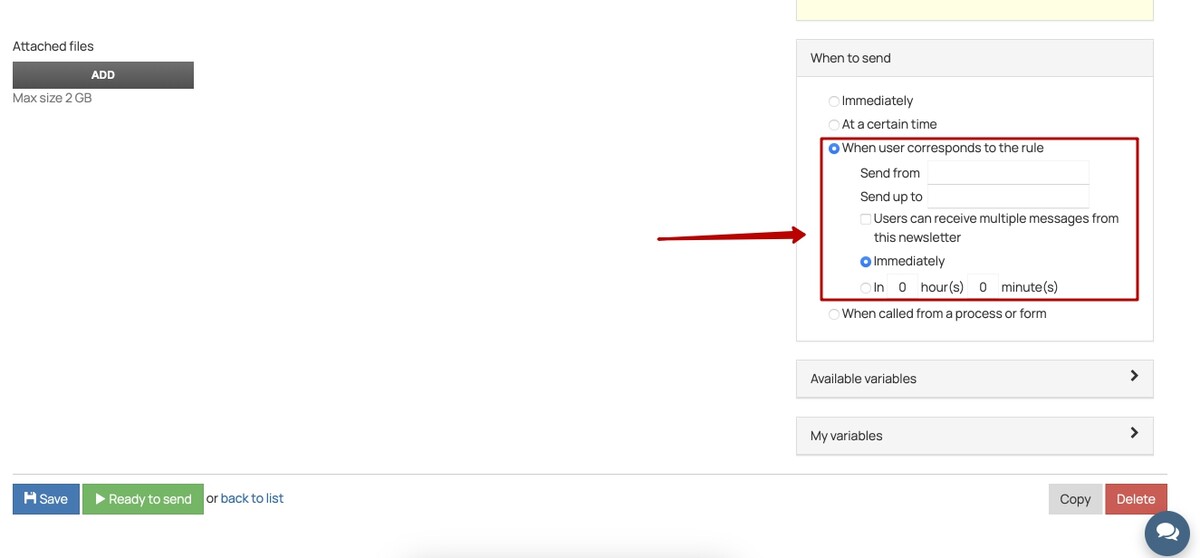
The mailing list configured in this way will operate constantly and will send letters to those users who will be added to the specified group on the registration form.
You can read more about working with mailing lists in our blog.
4. Creation of mailings with a reminder of the webinar
Great, the main work of preparing for the selling webinar is done. It remains only to remind the participants who registered for the webinar about the upcoming event. Most often, several reminders are made: on the day of the webinar and an hour/half hour before the start of the broadcast.
In the text of the mailing, it is worth mentioning the time of the webinar once again and attaching the link to the webinar room again. To warm up interest in the webinar itself, you can supplement the letter with interesting information on the topic of the webinar.

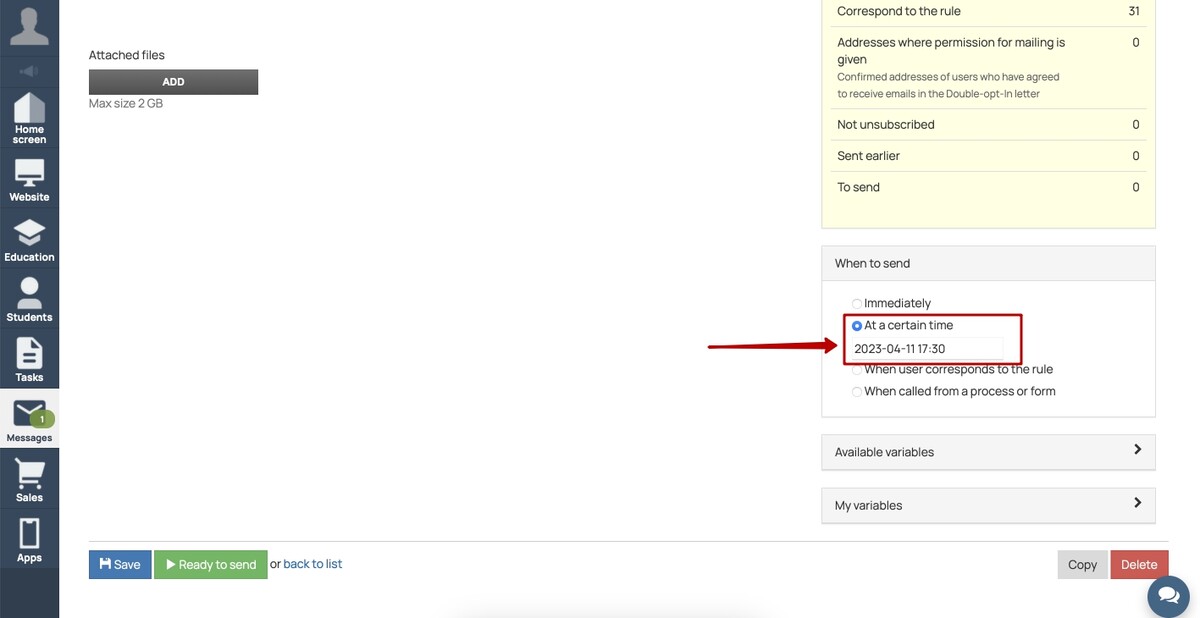
The mailing list configured in this way will start at the specified time and send notifications to those users who will fall under the rule (that is, will be in the specified group).
Therefore, users who sign up after the reminder mailing time will not receive this notification.
How to prepare a paid webinar?
Conducting a paid webinar has its own characteristics:
1. This is a private event, that users can enter only after payment.
For users to have access after payment, you need to create a product and offer. The entire setup sequence is described in detail in the article «How to get started with a GetCourse account?»
2. It is required to restrict access to the webinar in order to prevent following the link from those who did not pay for the event.
You can restrict access to the webinar in the «Website» — «Webinars» section by selecting a group of participants in the webinar settings:
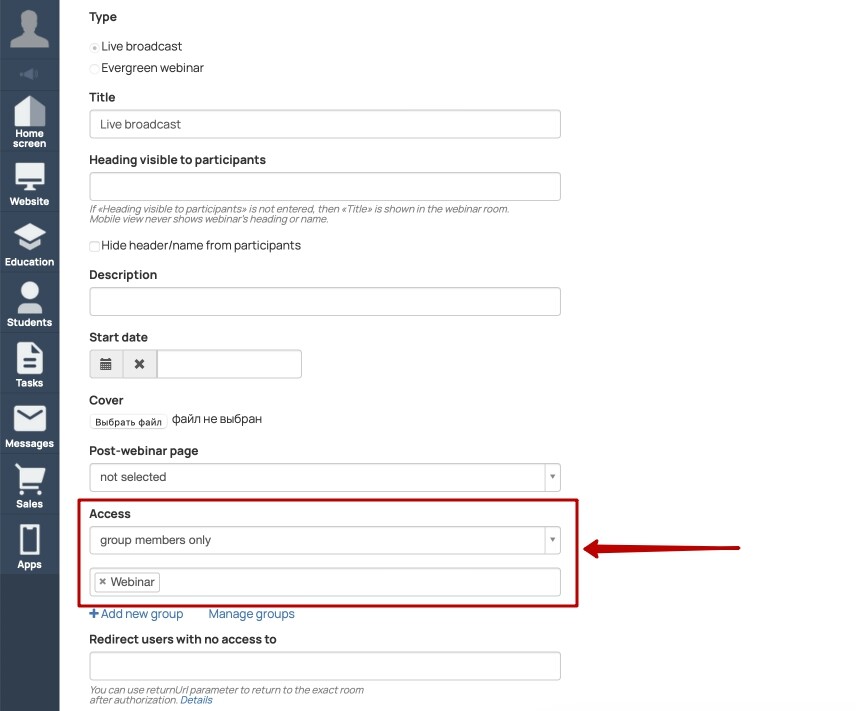
Users will be assigned to the required group after purchasing the offer.
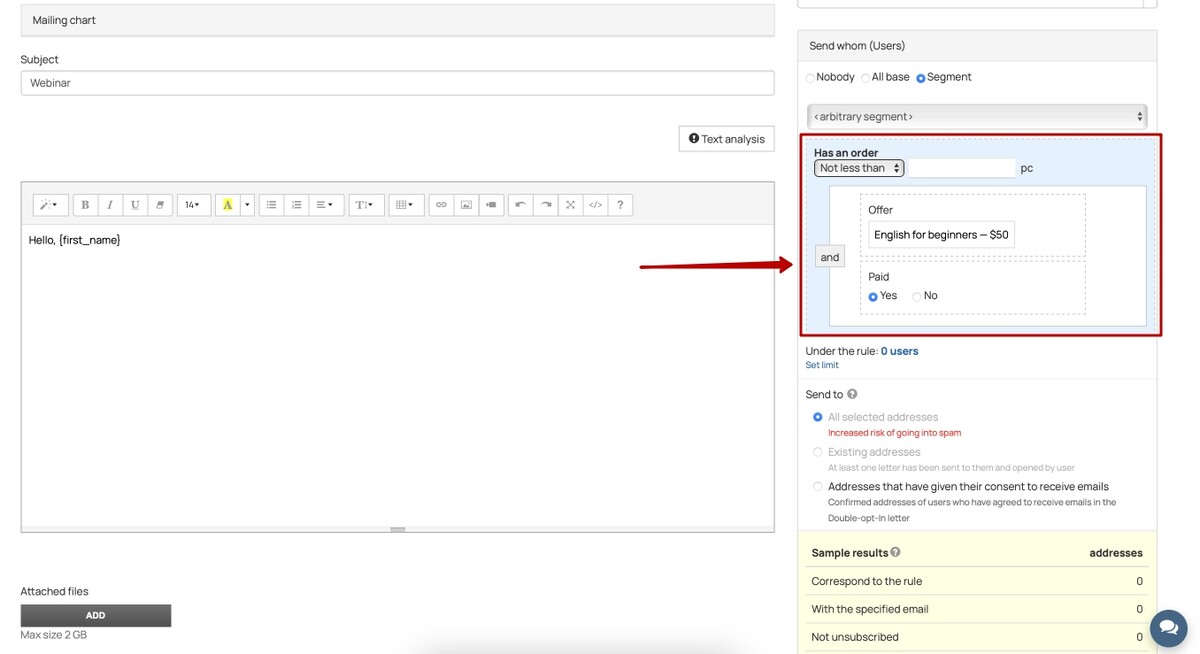
3. Mailings can be sent both according to the group of participants in the webinar, and according to the terms of payment for the order for the desired offer.
We use technology such as cookies on our website to personalize content and ads, provide media features, and analyze our traffic. By using the GetCourse website you agree with our Privacy Policy and Cookies Policy.

please authorize