Themes — a tool that allows you to make settings for custom page design in one place.
Using themes you can:
- style page elements CSS;
- apply JavaScript code;
- use fonts from Google Fonts collection.
This tool will be useful primarily for those who have experience working with CSS and JavaScript, and also actively use them when designing a large number of pages. All necessary settings and code applying can be done in one place - in the theme.
You can use created theme to customize:
- CMS pages placed in a folder;
- separate training and subtrainings;
- internal account pages.
In this article:
How to create a theme
A theme can be created by:
- account owner,
- administrator,
- employee with right «can manage CMS».
To create a theme:
- Go to «Website» — «Pages».
- On the dropdown menu «Sitemap» choose «Themes».
- Press «Add theme» button and fill in its name.
The created theme will be displayed in the list of themes.
How to customize the theme
Theme customization can be done on «Settings» tab, where you can:
- Change the name.
- Enable/disable additional options.
- Select parent theme — its settings will be applied to this (child) theme. It can help, for example, to avoid manually transferring code from one theme to another.
- Go to Bundle files, where you can view all the CSS/JS code used in the theme without going into additional files and theme tabs. Here you can also go to the CSS code validator (CSS verification service from W3C).
- Add additional CSS/JS files.
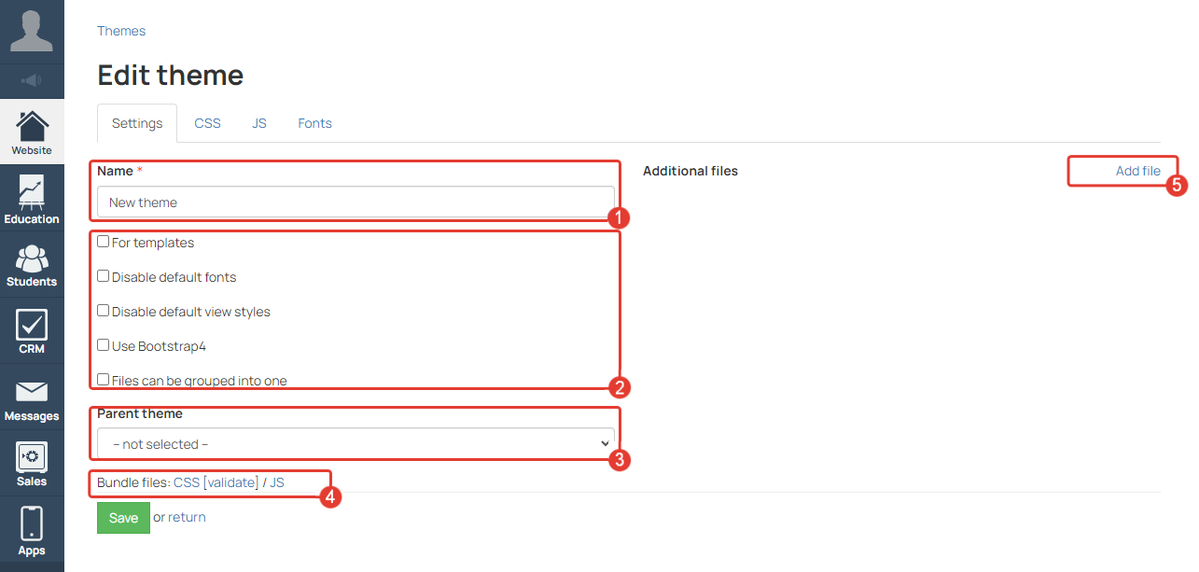
Theme settings
Additional options on «settings» tab
«For templates» — use this option, if in the settings of pages with this theme the option «Use as a template» is enabled.
«Disable default fonts» — allows not to connect default fonts to the page. Used in custom layout for pages optimization.
«Disable default view styles» — allows not to include a standard style file superlite-block.css. on the page. Used in custom layout for pages optimization.
«Use Bootstrap4» — for cases when the pages have a specific layout that requires Bootstrap4 and not Bootstrap3 which is used by default.
It can help, for example, to add more flexibility to manage adaptability. If you are using standard blocks or standard CSS and HTML codes that do not require any plugins or frameworks, then enabling this option is not required.
«Files can be grouped into one» — technical option, when enabled, it will “glue” the JS and CSS codes added in the corresponding tabs and in additional files of the theme.
You can enable this option if massive codes are used in the theme, and the codes divided into many additional files. This will improve browser performance so that pages with a theme or individual elements of them load faster.
Additional files
If necessary, you can add additional files to the theme. In the file settings, you can specify CSS/JS code that will be used in conjunction with the code added in the CSS and JS tabs.
This can be useful if you need to structure your code to make it easier to work with.
For example, you might add code in one CSS file to change the font style of a page, and in another file — to change the style of the blocks.
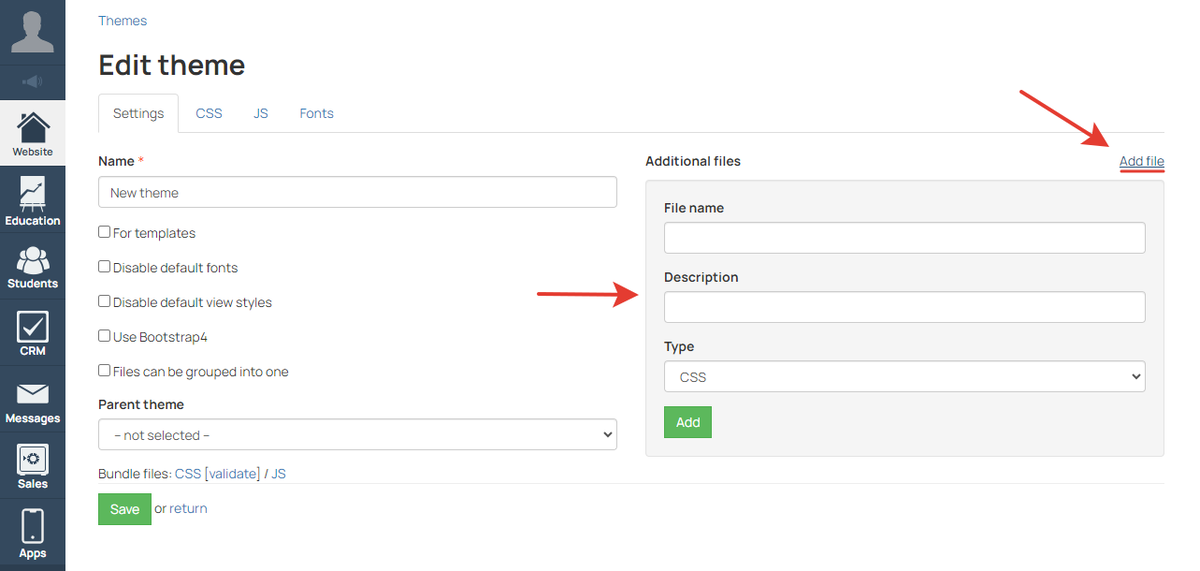
Add files to theme
How to apply custom CSS styles
You can apply custom CSS styles on the «CSS» tab. the code will be applied to pages with this theme.
CSS code should be added without tags <style>...</style>.

Field for CSS-code
How to apply JS code
You can add JavaScript code, which will be applied to pages with the theme, on the «JS» tab.
JS code should be added without tags <script>...</script>.

Field for JS-code
Attention: we recommend to test custom code on the pages copies, so that the work of the original code is not disrupted as a result.
How to set fonts using theme
Using theme, you can set custom fonts for the account pages. To do it:
Font Choosing and connection
To choose the necessary fonts go the Google Fonts page.
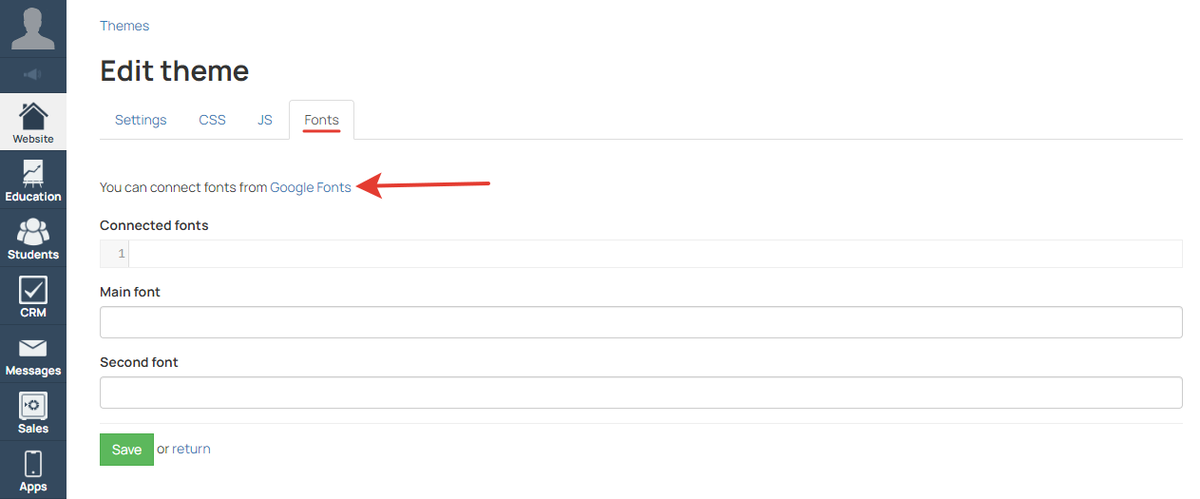
Connecting fonts
On Google Fonts page:
- Choose the necessary font.
- Press «+ Select this style» next to the suitable style.
- Copy the code from the «link» block.
- Paste the code to the field «Connected fonts» in the theme settings.
To connect several fonts or styles to the theme:
- Select the necessary fonts on Google Fonts page — the selected fonts will be displayed in the «Review» list.
- Add new part of the code to the field «Connected fonts» in the theme settings.
How to set fonts for the paged with theme
You can set connected fonts to:
Setting fonts to all blocks of the page
To set connected fonts for headers and main text on each block of the page, you need to open the «Fonts» tab of theme settings, and enter the font names to the fields:
- Main font (for main text);
- Second font (for headers).
Setting fonts to separate blocks using CSS
You can set fonts for a separate block. To do it, leave the fields "Main font" and "Second font" empty.
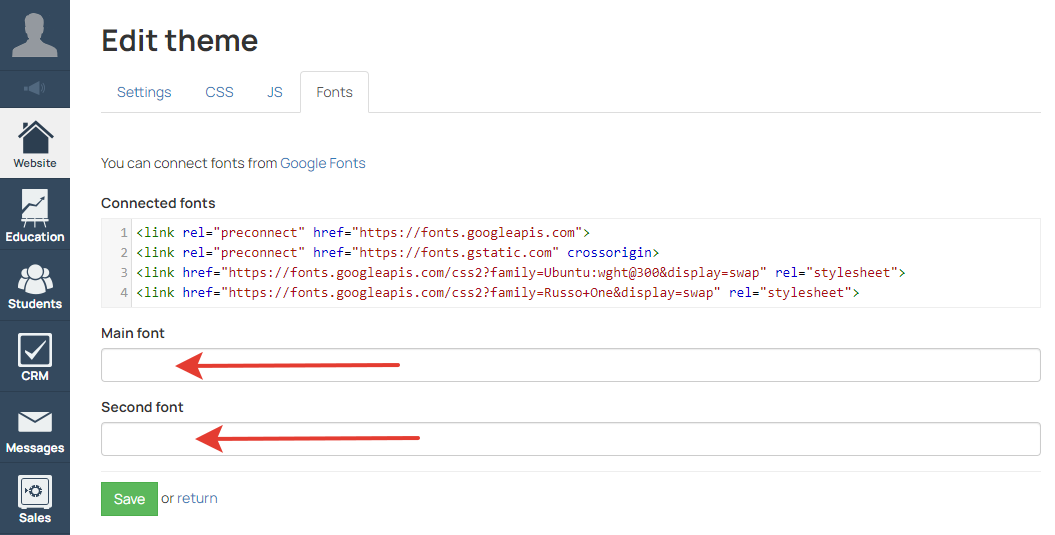
Main and second fonts are not specified
The fonts connected to the theme can be applied to a block in the detailed style settings, to do it you need to add CSS-code for selector.
You can change fonts on site pages using other methods described in the following articles:
- How to Set Custom Font on a Page — this article describes the process of connection custom fonts, which you can find on the web, for example.
- How to Use System Fonts on Website and Blog — in this article you can find how to apply system fonts to separate pages, posts to blog and to blocks on pages.
How to apply a theme to a folder
To apply a theme, create a folder and select the theme in the folder settings. The theme will be applied only to the pages from this folder.
You can move a page to a folder :
- on the sitemap;
- selecting the folder in the page settings.
How to use theme for account design
The account theme can be set by:
- account owner;
- responsible administrator.
To apply the theme to the internal account pages:
- Go to «Profile» — «Account Settings» — «Settings» tab.
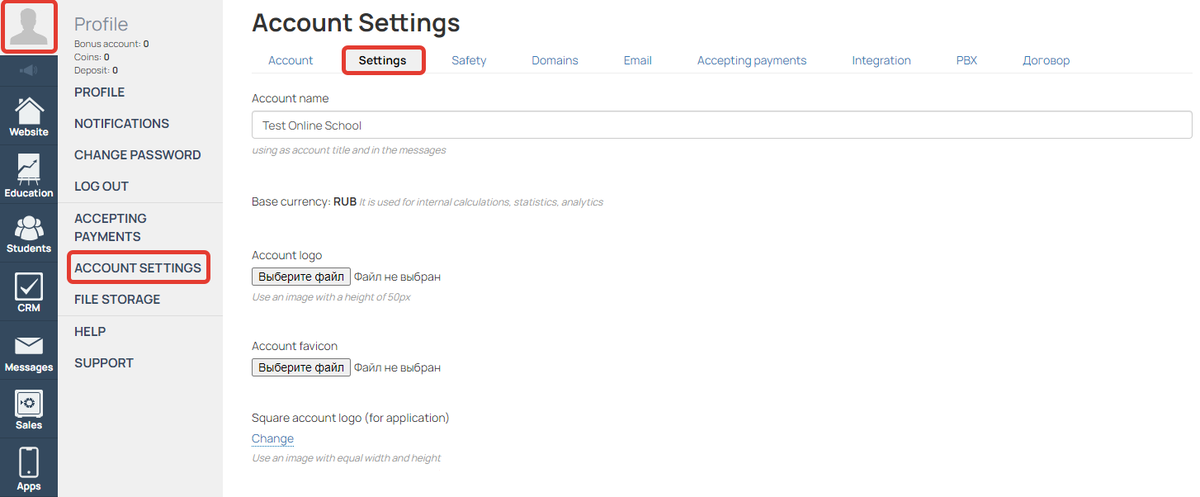
«Account settings» — «Settings»
- Select the necessary theme for the parameter «Account theme».
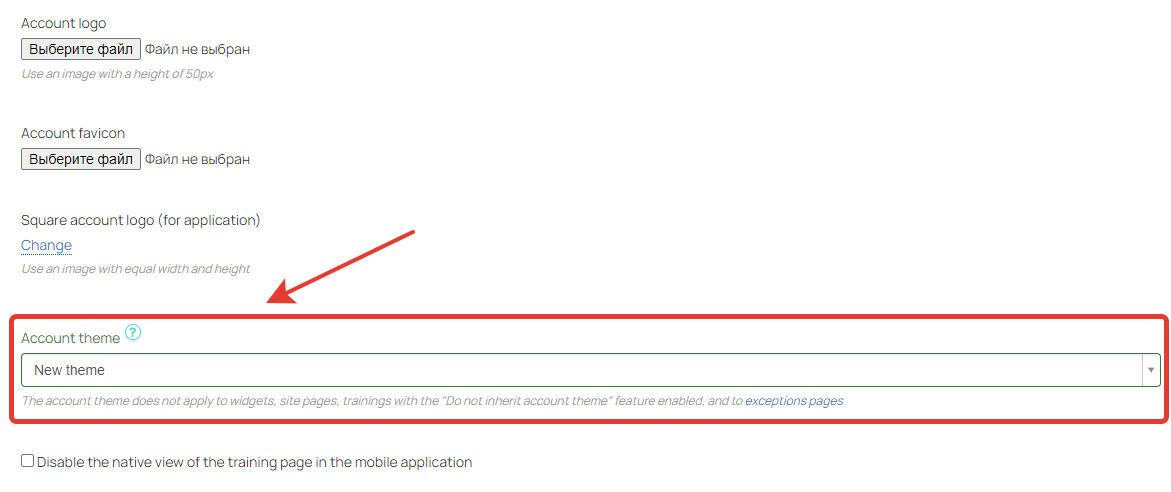
Selecting account theme
- Save changes by "Save" button at the bottom of the page.
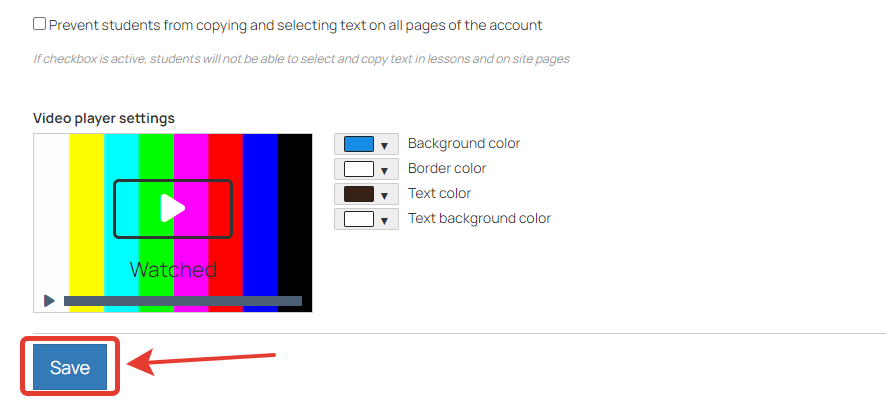
Saving changes
After saving the changes, the theme will be applied to most of the internal pages of the account, including pages of trainings and lessons.

Fonts from account theme applied to a lesson page
Attention: for security reasons custom code is not applied to several system pages.
Account theme is also not applied to:
- site pages (the theme can be applied separately to a folder with pages);
- blog posts;
- widgets.
How to apply a theme to a training
Trainings inherit account theme by default. If necessary, you can apply a different theme to a training.
Theme can be applied to a training by:
- account owner;
- administrator;
- main teacher of the training;
- additional teacher of the training (if the option «Editing trainings and lessons is prohibited for additional teachers» is disabled).
To apply a theme:
- Open training and go to the «Settings» tab.
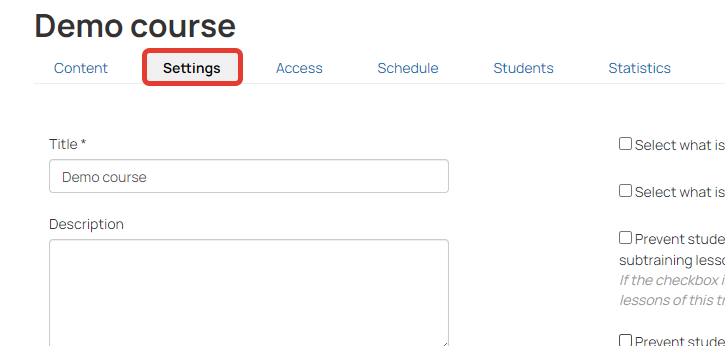
Training settings
- Select a theme in the parameter «Training theme».
- Save changes.
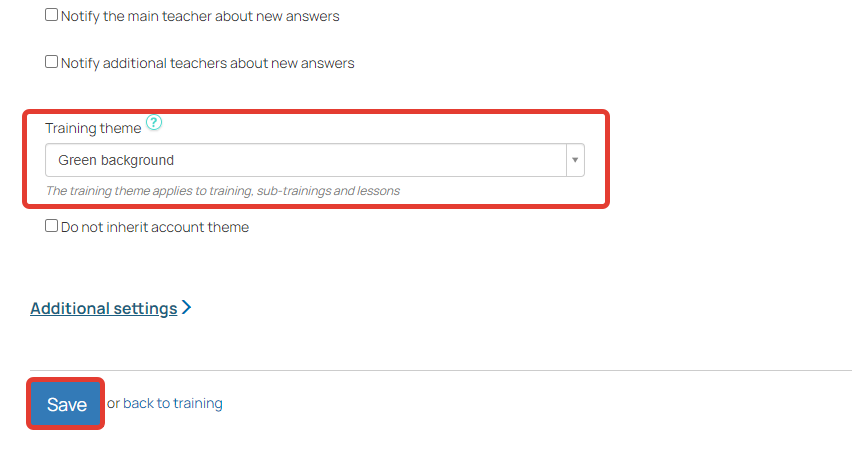
Training settings — training theme
After this the selected theme will be applied to the pages which are available for students:
- «Content» tab of the training and subtrainings;
- Lesson pages.
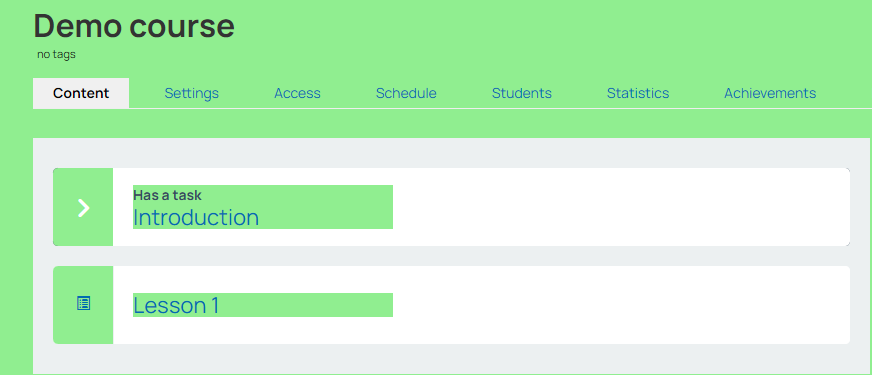
Training with applied theme

Lesson with applied theme
Theme Inheritance
For one training two themes can be applied:
- account theme;
- training theme or the theme of the closest parent training.
Important! If the themes contain different parameters, both themes will be applied at once.
For example: you created 2 themes and applied them to different objects:
- Theme for setting fonts as the account theme.
- Theme for setting a background color as the training theme.
As a result, both themes will be applied to the training: the fonts and background color will be changed.
If you do not want the account theme to be applied to the training, enable «Do not inherit account theme» option in the training settings.
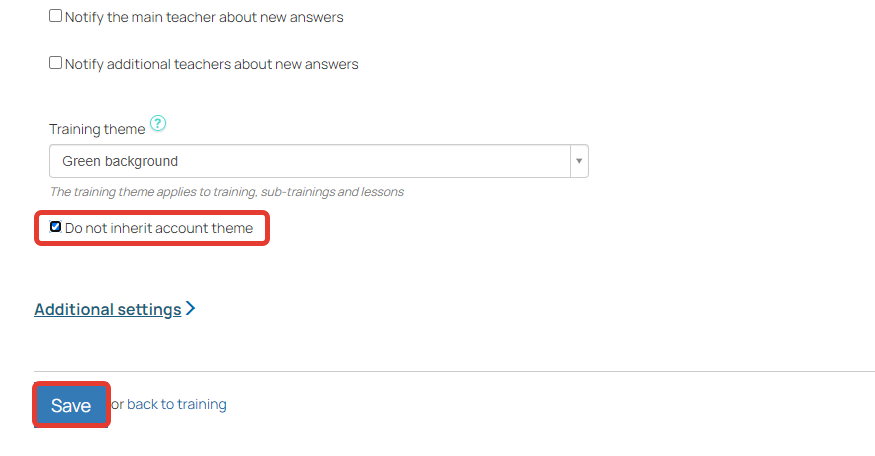
«Do not inherit account theme» option
If account theme and training theme contain similar parameters with different values, the values from training theme will be applied.
We use technology such as cookies on our website to personalize content and ads, provide media features, and analyze our traffic. By using the GetCourse website you agree with our Privacy Policy and Cookies Policy.

please authorize