Training is a structured way of delivering teaching material that you want to convey to your students. All of your courses, webinars, lessons and other materials can be implemented in the form of trainings.
The content of the article:
Creation of training
To create a training, go to the «Education» — «Trainings» section and click «Add course». Then enter its name and, if necessary, a description.
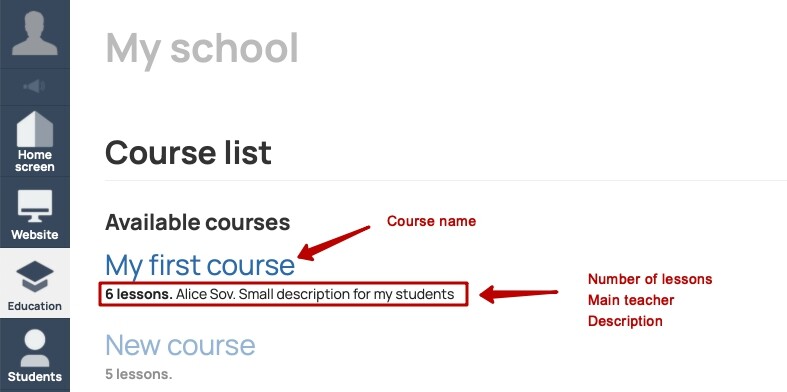
The training will appear in the general course list. The number of lessons in it, the main teacher and the description of the training will be indicated under the name of the training. Students will also see this training information if the training is available to them or is displayed in the list of trainings.
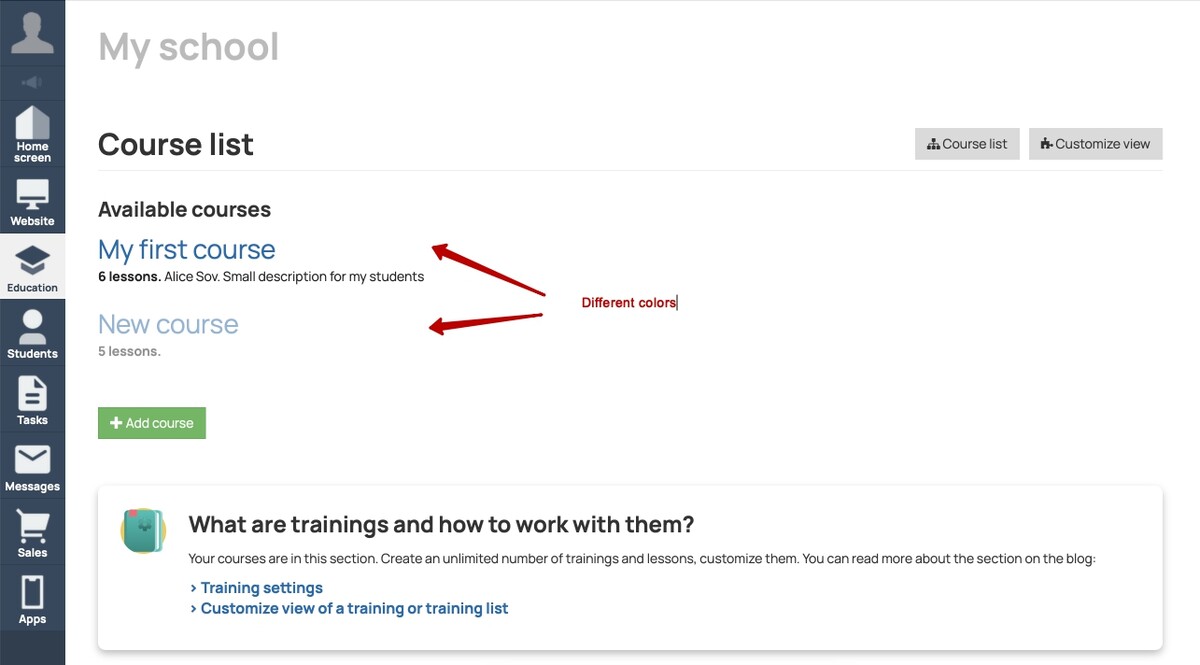
Trainings can have a different color depending on the existing lessons and students in it.
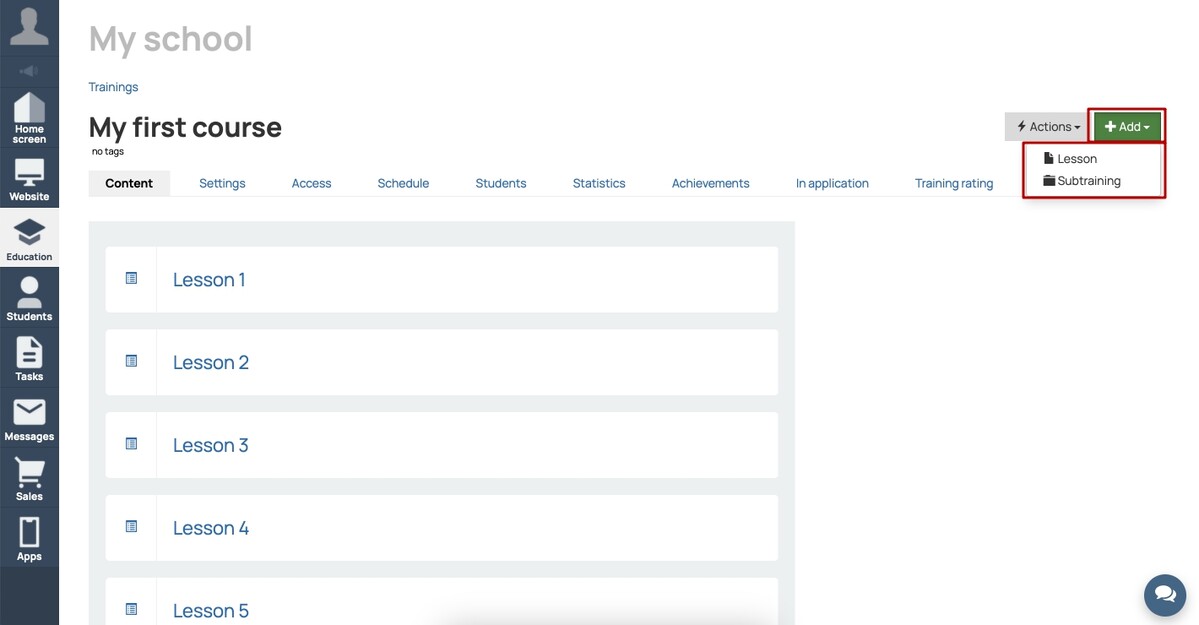
Trainings can consist of lessons and/or included subtrainings (each of which is a separate individual training).
After creating the training, quick editing of the lessons will be available, with which you can:
- immediately add the required number of lessons of the «Visual kit» type;
- set their name, description and add an image;
- indicate whether the lesson has a task and whether it is a stop-lesson;
- swap lessons by dragging them with the mouse to the desired place.
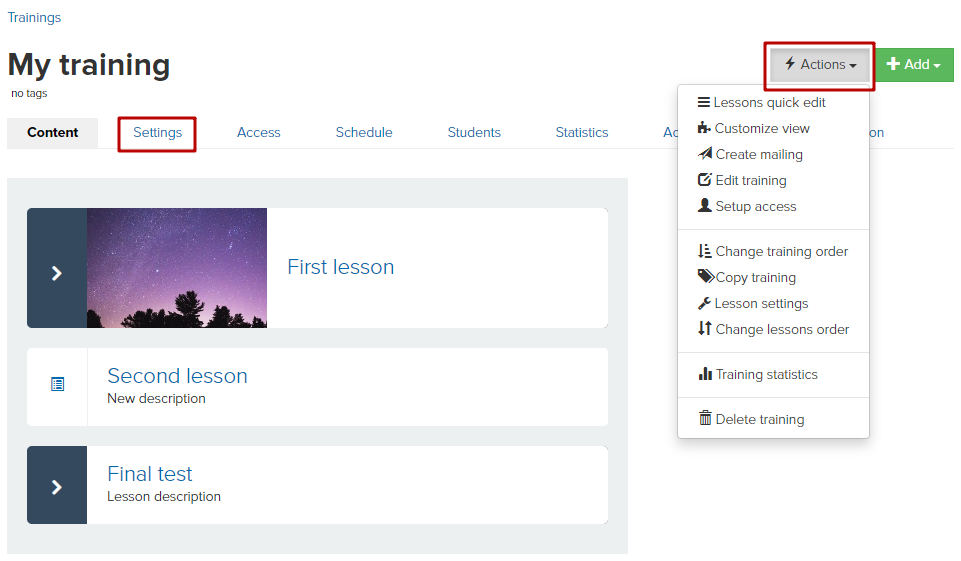
Further, quick editing of lessons is always available by clicking the «Actions» — «Lessons quick edit» button.

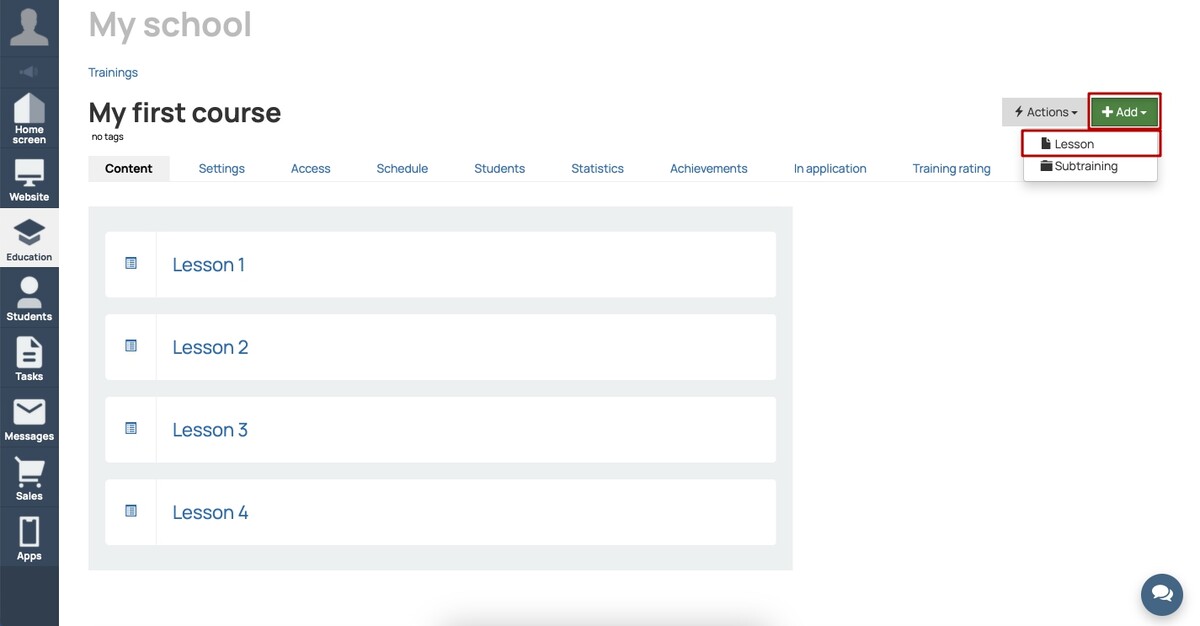
If you need to add webinar, then you must use the «Add» — «Lesson».
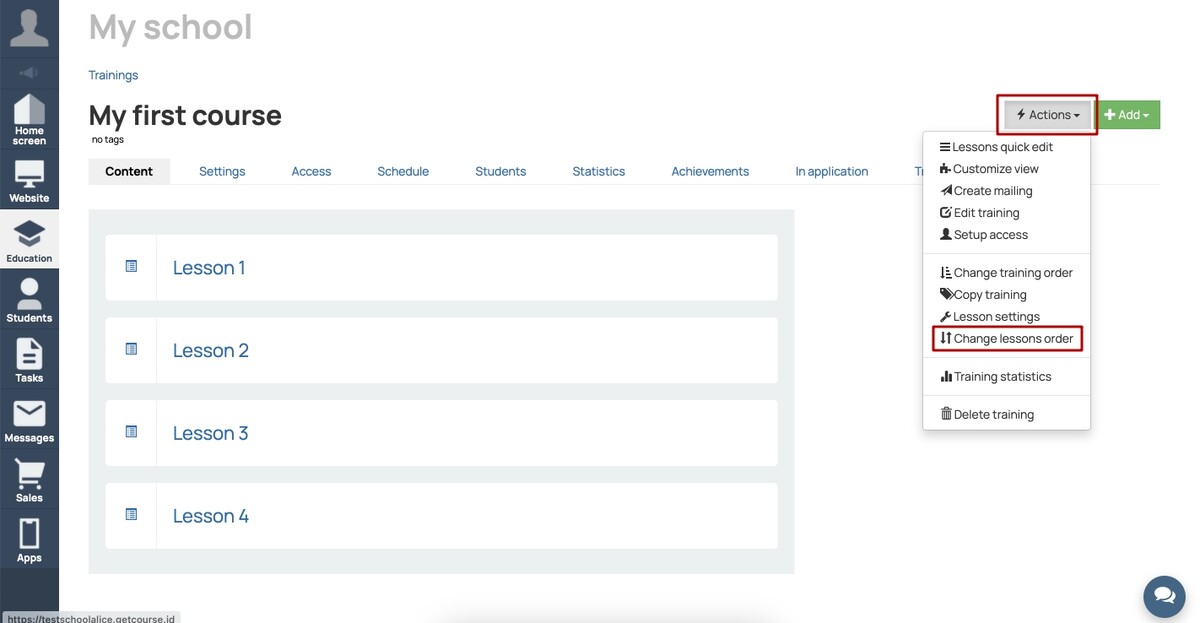
The order of the lessons can also be changed by clicking on «Actions» button — «Change lessons order». Please note that if the training has stop-lessons, then changing the order of the lessons may affect user access.
There are two ways to change the order of trainings:
1) from the general list of trainings by clicking on «Course list»;
2) in a specific training, choosing «Actions» — «Change training order».
General training settings
When creating a training it is necessary to determine who and how gets access to it, who is the teacher, what the training lessons contain and on what schedule they pass, set the criteria for the students to pass the lessons.
You need to:
1. Set the rule of access to the training — by purchase, by group, by completing another training or open access to all registered users.
For subtraining, there are additional access settings.
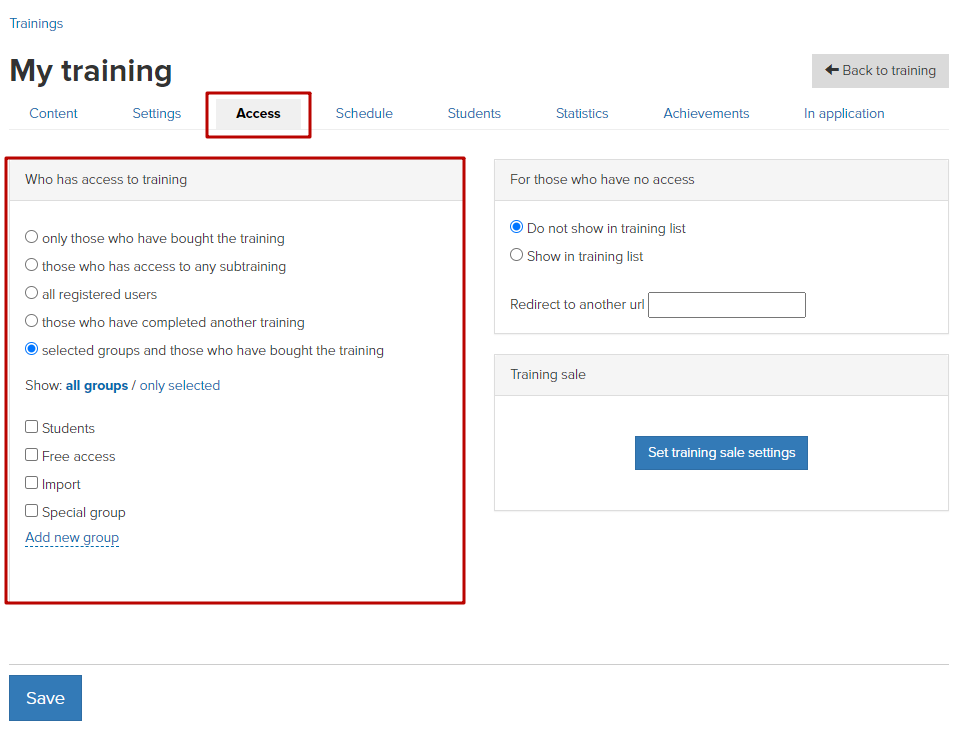
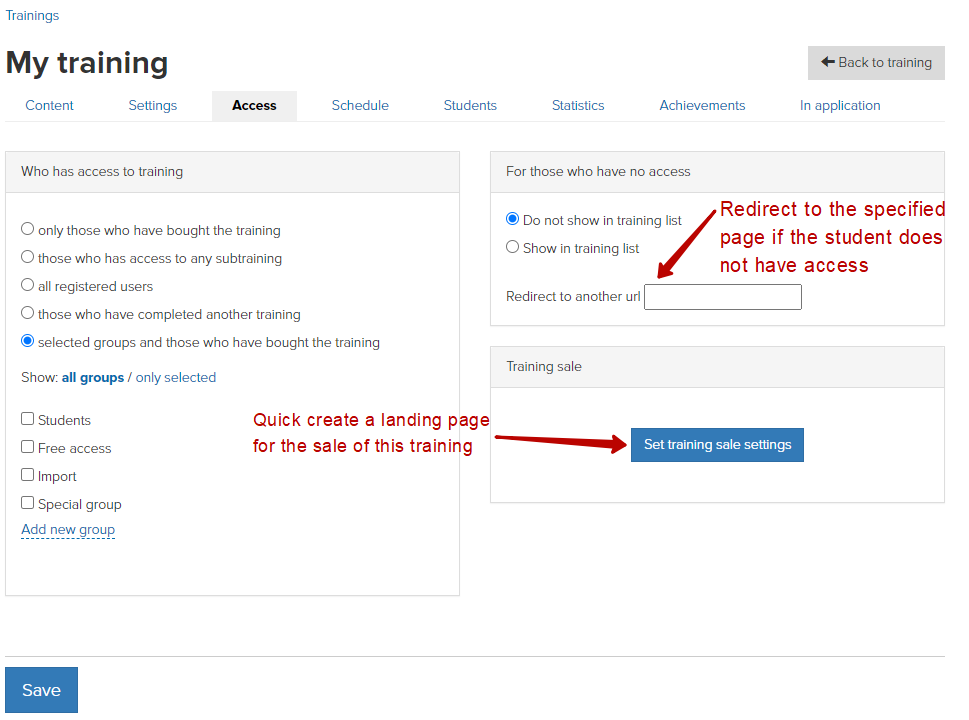
Here you can also configure whether the training is visible in the general list of trainings to those users who do not have access to it. If you specify a redirect page, the training will be visible to all users in the list of trainings, but if they do not have access, they will be redirected to the specified page.
Also here you can quickly create a landing page for the sale of this training.
2. Make a list of lessons and customize each of them, add tasks if necessary.
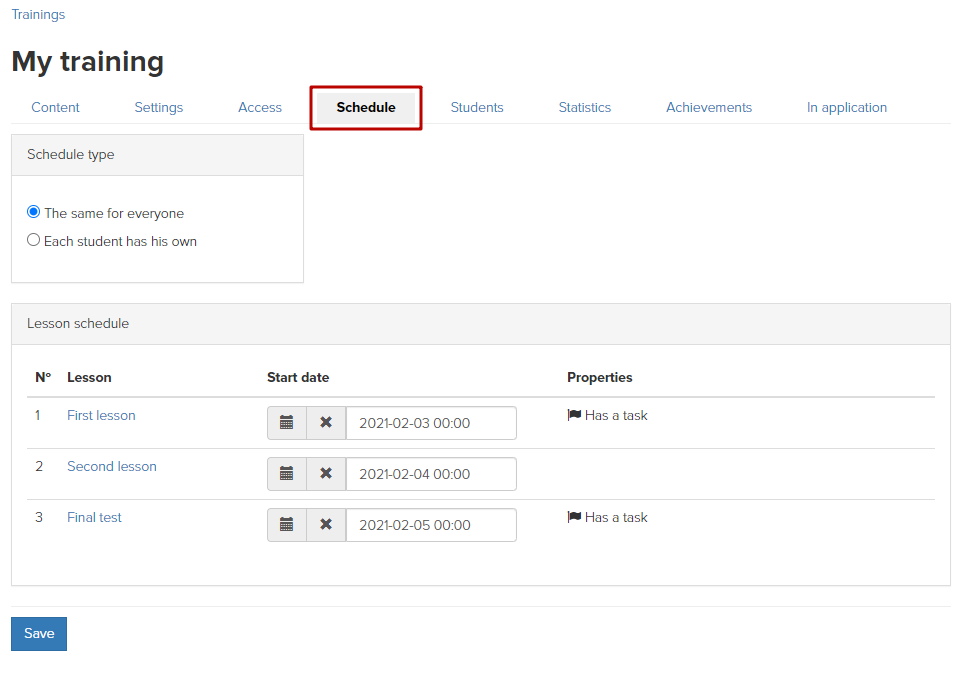
3. Form a schedule of lessons (general or individual one).
4. You can add a diploma and other achievements.
The training has a number of additional settings.
In the training, you can also see information about its students.
Important: for correct operation, it is not recommended to make changes on the «Access» and «Schedule» tabs in trainings and subtrainings if they already have students. These actions can lead to the loss of access for clients and incorrect operation of restrictions.
We use technology such as cookies on our website to personalize content and ads, provide media features, and analyze our traffic. By using the GetCourse website you agree with our Privacy Policy and Cookies Policy.

please authorize