On GetCourse in the “Website” section there is the opportunity to conduct webinars without the participation of Youtube - through our own broadcast service.
When conducting webinars through the GetCourse service, there is no need to configure the channel on Youtube and wait for the embedding of the live broadcast to be approved.
You can prepare and start the broadcast in just a few minutes!
After the webinar ends, the script is saved, on the basis of which you can configure the auto-webinar.
The video of the broadcast is saved on the GetCourse side. You can download it, then upload it to the lesson or add to the page of your website.
The content of the article:
- Important
- Access to the webinar for employees
- Conducting a webinar through a browser
- Conducting a webinar through a video encoder
- After the webinar
Broadcasts through GetCourse can be started both through a separate video encoder, and using your browser and webcam only.
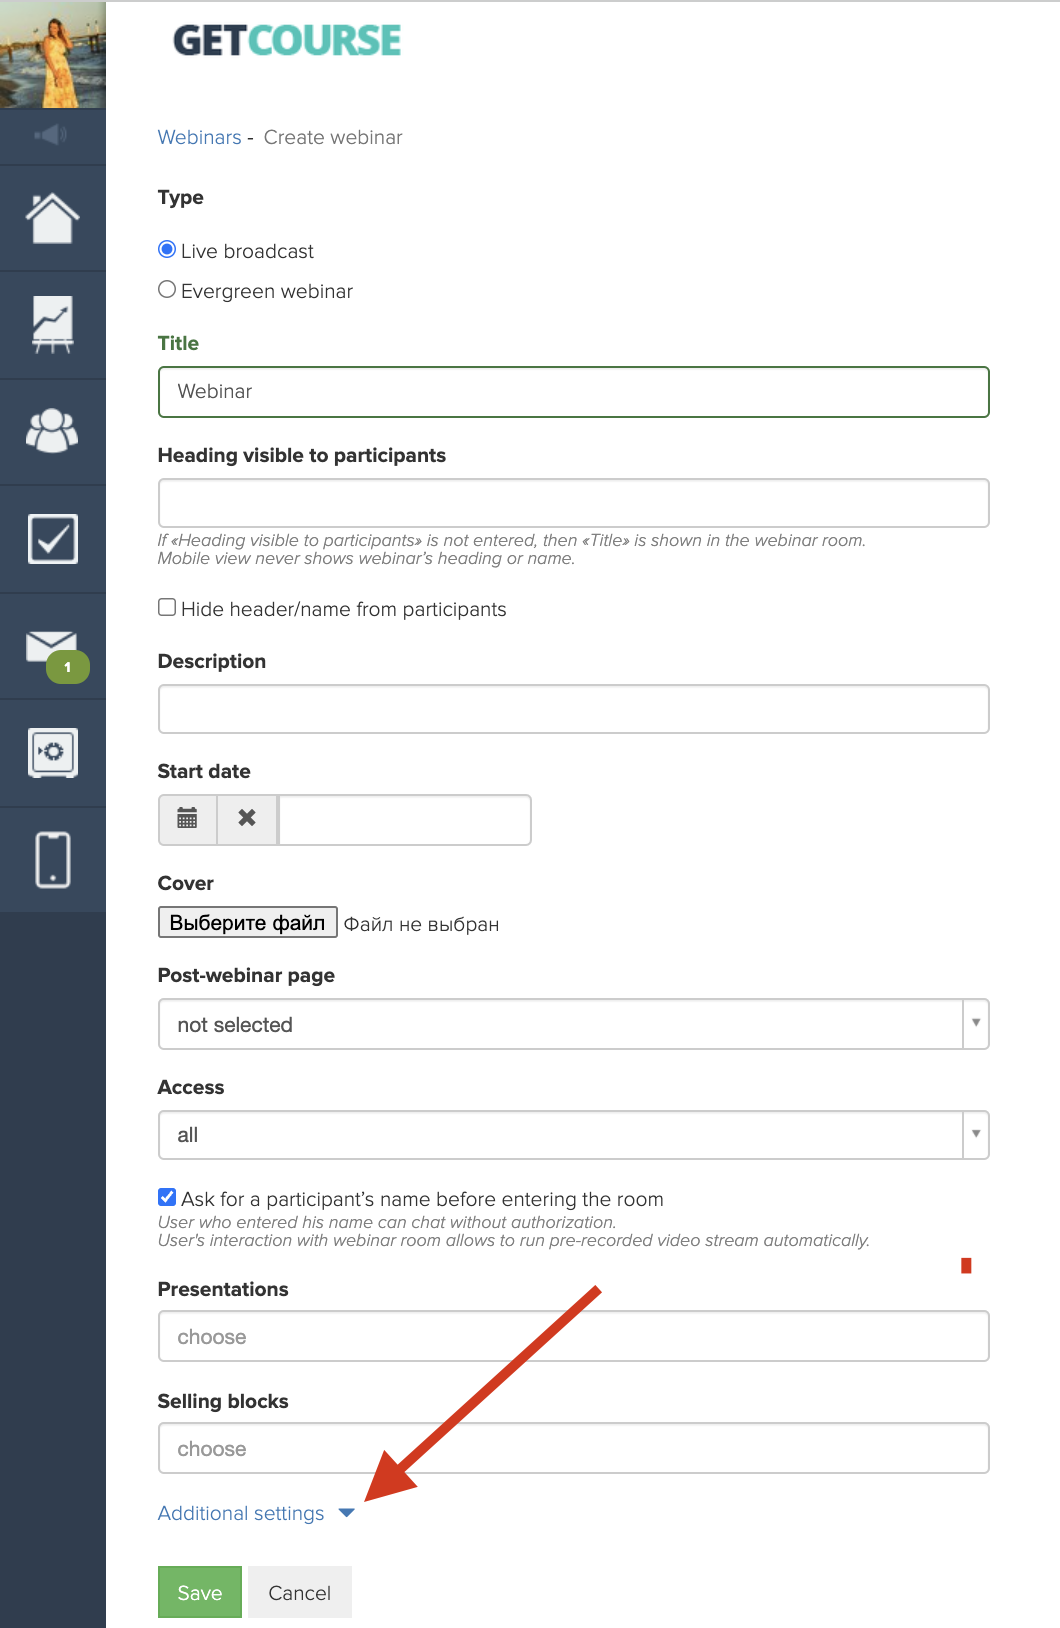
By default, when creating a webinar, broadcast via the browser is selected.
To change the type of broadcast, open the advanced settings:

Please note: depending on the settings of your device and Internet connection, the broadcast may be displayed in the webinar room with a delay.
The amount of delay can also vary depending on the device and the Internet connection on the side of the viewer.
Actions in the webinar room, such as showing presentation slides or selling blocks, as well as sending comments to the chat, are carried out without delay.
Therefore, we recommend testing the broadcast and taking into account the delay in advance - before the webinar.
How to ensure maximum broadcast stability and minimize latency?
In order to ensure stable broadcast transmission/reception, it is important to consider the following points:
1. Technical characteristics (power) of the device:
- Use powerful modern equipment (PC and camera).
- Close all unused applications during the broadcast.
2. Speed and stability of the Internet connection:
- Reliable network traffic provides a stable video stream.
- Make sure your internet connection provides fast connection speed. You can check the speed, for example, here (the upload speed parameter is important).
3. Internet browser:
- Use the latest (updated) versions of browsers and periodically clear cookies and cache.
- During the broadcast, close all unused tabs.
It is advisable to observe these recommendations both by the hosts and, if possible, the audience of the webinar.
How can an employee be granted access to webinar management?
The administrators of your account always have the ability to create, modify and conduct webinars. Employees, by default, are deprived of this opportunity.
If you need to give the right to create/manage a webinar to an employee, then read this article.
CONDUCTING A WEBINAR THROUGH A BROWSER
Please note: there is a restriction on broadcasts conducted through the browser - no more than two broadcasts can be launched in your account at a time.
This restriction does not apply to broadcasts conducted through a video encoder or YouTube, as well as to auto-webinars.
It is not necessary to use special applications to conduct a webinar. You can conduct a webinar using your browser only.
We recommend using popular browsers of up-to-date versions:
- Chrome;
- Mozilla Firefox;
- Yandex;
- Safari.
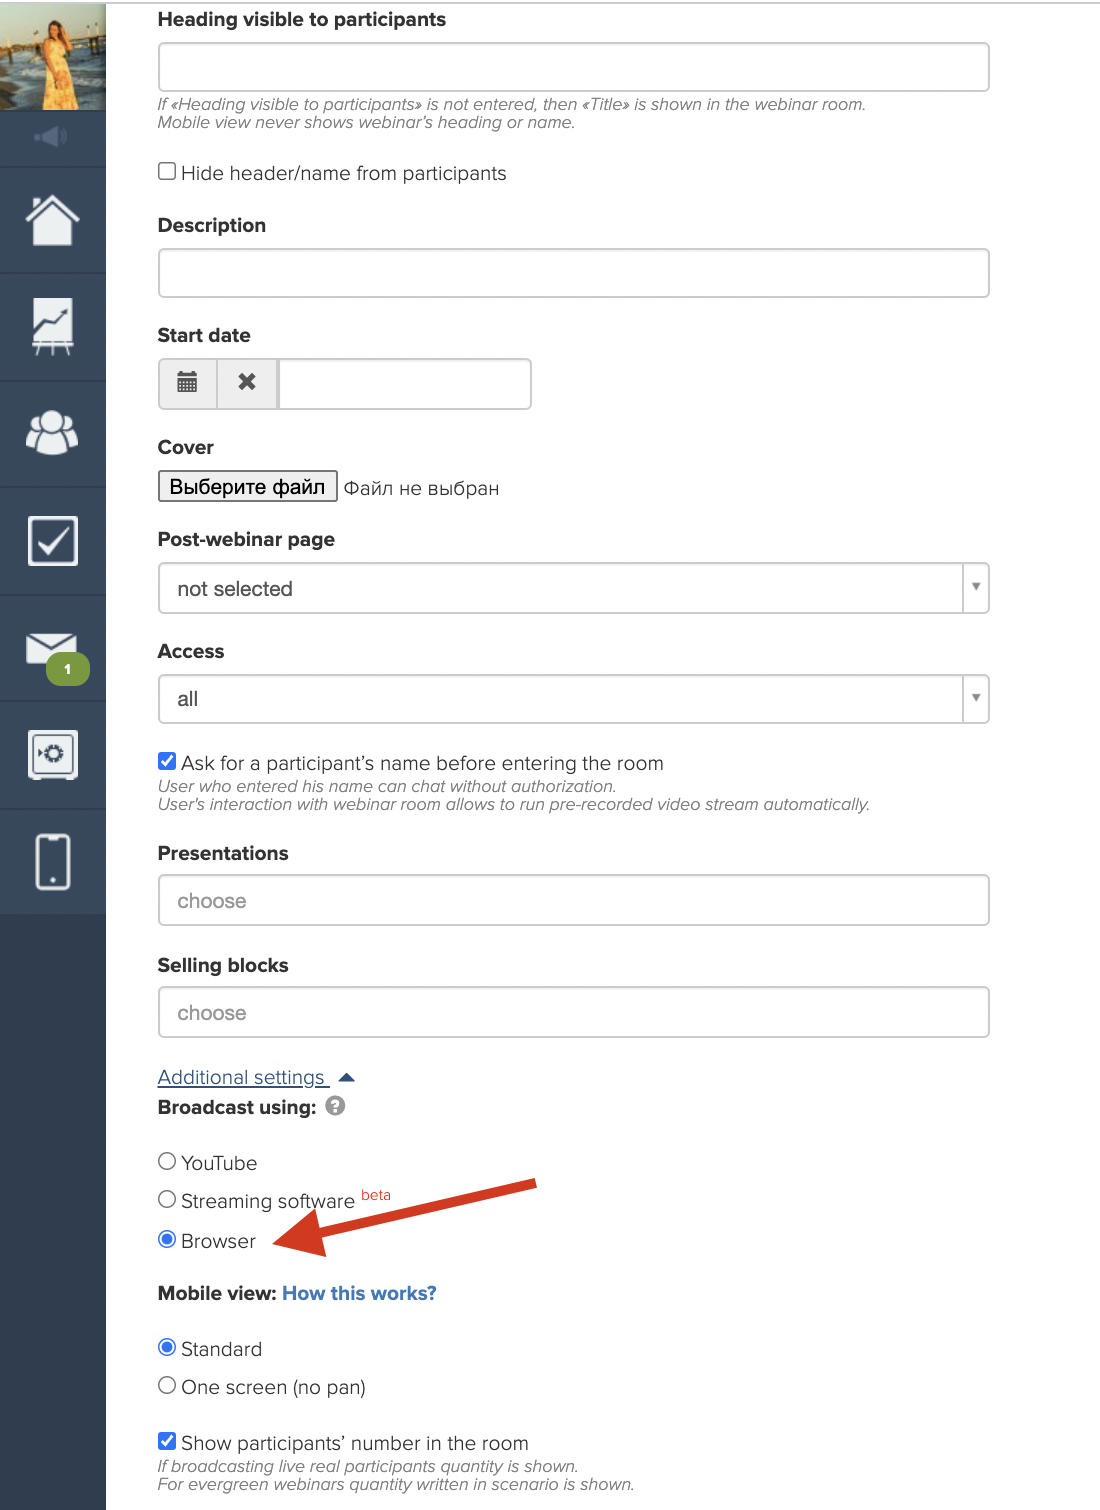
When creating a webinar, by default the option of conducting through the browser will be selected:
After creating the webinar room, you can find the webinar menu in the upper left corner next to the webinar name. Having opened the menu, you can proceed to editing the webinar, download comments, see users statistics and much more.
The link to the webinar room for viewers can be copied by clicking on the “Eye” icon in the upper right corner:
In the webinar room, before turning on the video, you can choose one of the available resolutions.
First make sure that your webcam can record video with the specified resolution. You can also select the “auto” parameter - in this case, the resolution available for your camera is automatically selected.
It is important to understand that the higher the resolution, the better the video quality, but the more resources will be required for stable broadcasting and the longer the delay can be.
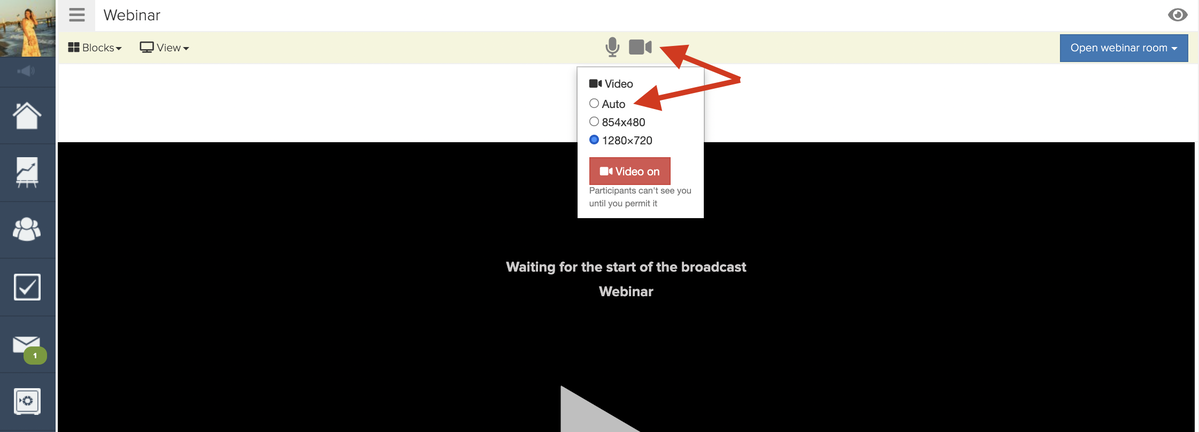
After clicking on the “Enable video” button, the browser will ask for permission to connect the camera and microphone. Allow the connection to successfully enable the video.
Please note: permission to connect the camera and microphone can be issued only when going to the webinar room via a secure https connection. In the address bar, a secure connection is usually marked with a closed lock icon.
If you go to the webinar page at the system address of the form account_name.getcourse.io, then the connection will be protected by default.
If you linked your account to your own domain and go to the webinar page at its address, you can protect the connection by setting an SSL certificate for the domain.
After starting the video, open the room and start the live broadcast for the audience
During the webinar, you can control whether the camera and microphone are turned on or off.
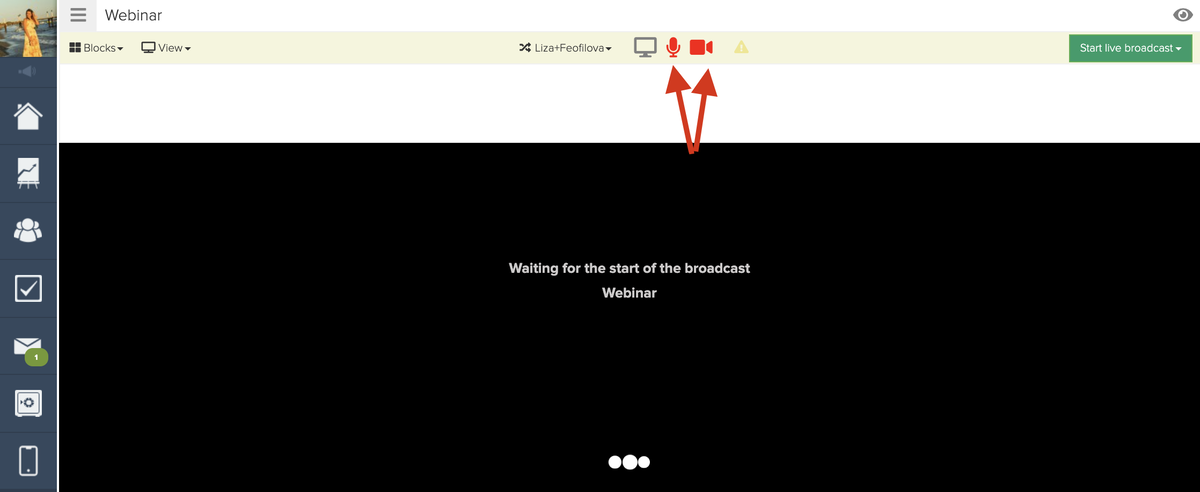
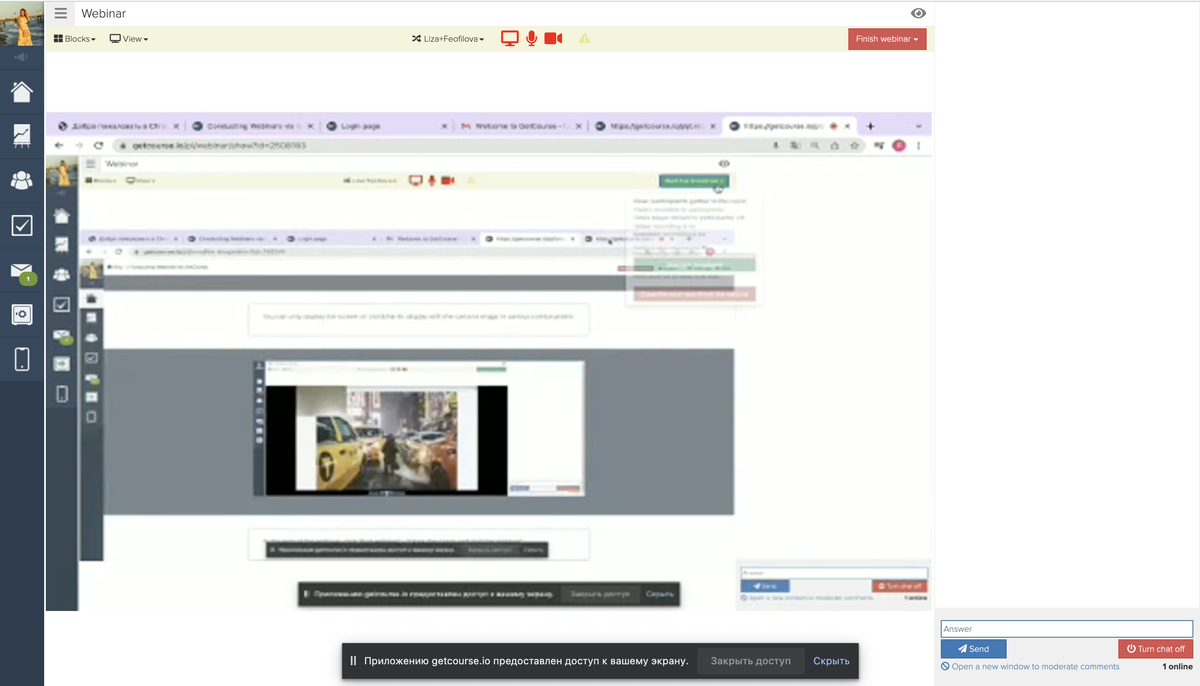
When conducting a webinar through the Google Chrome browser, the ability to demonstrate a screen is additionally available
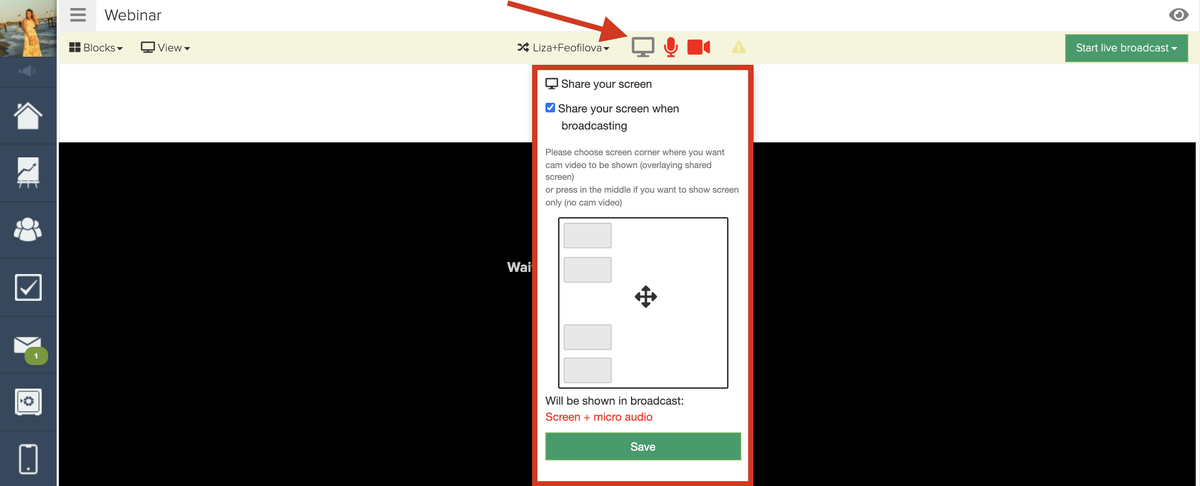
You can only display the screen or combine its display with the camera image in various combinations.
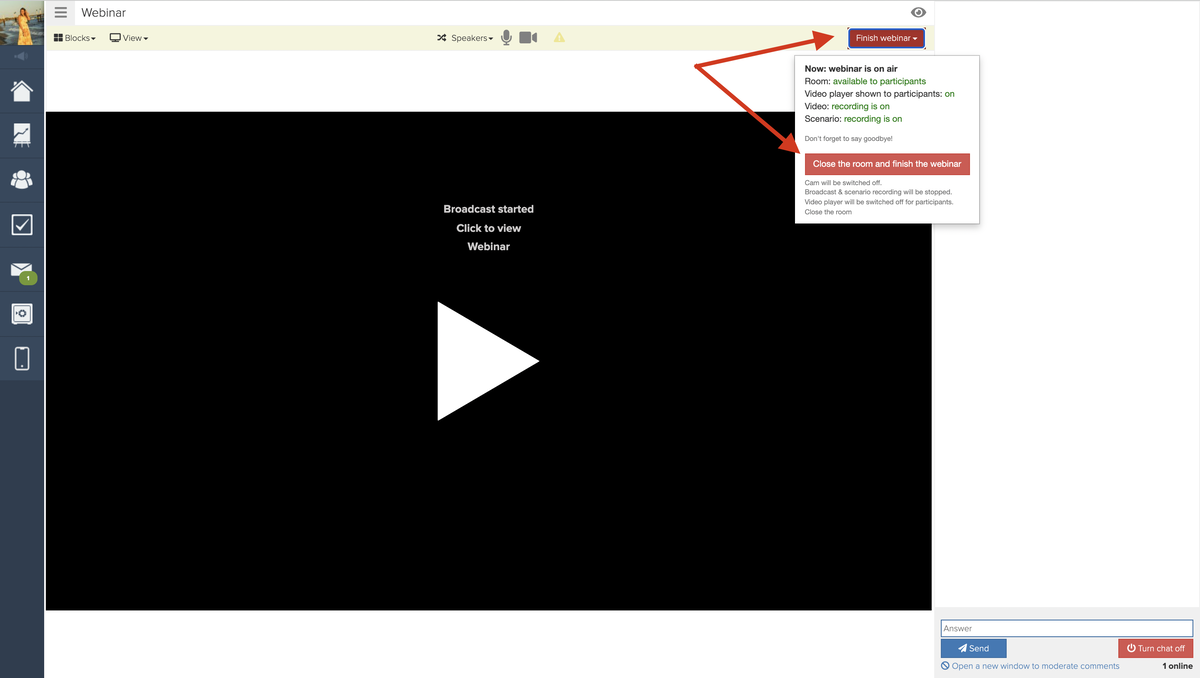
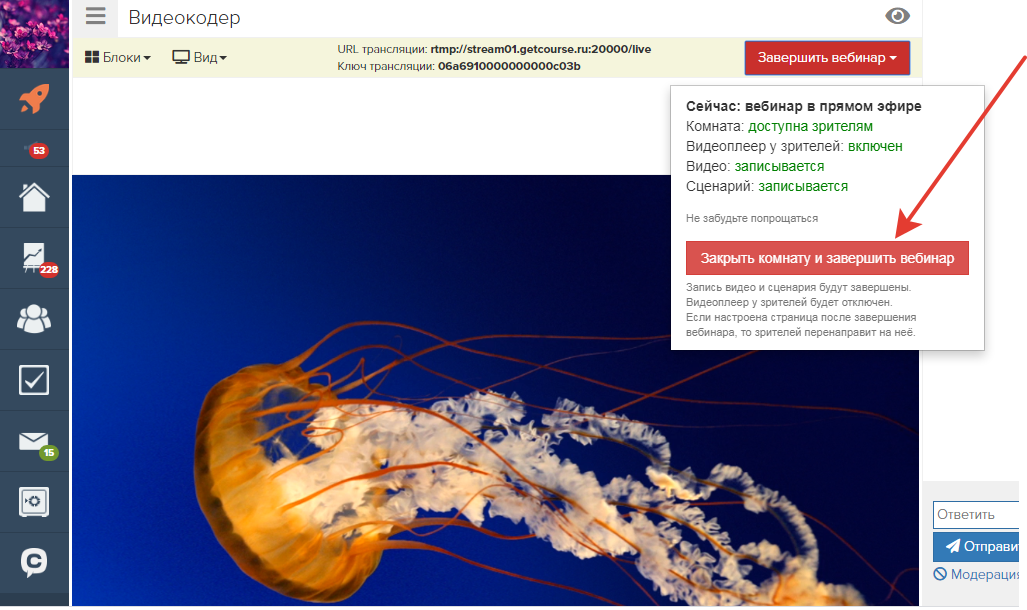
At the end of the webinar, click “End webinar” - “Close the room and end the webinar”
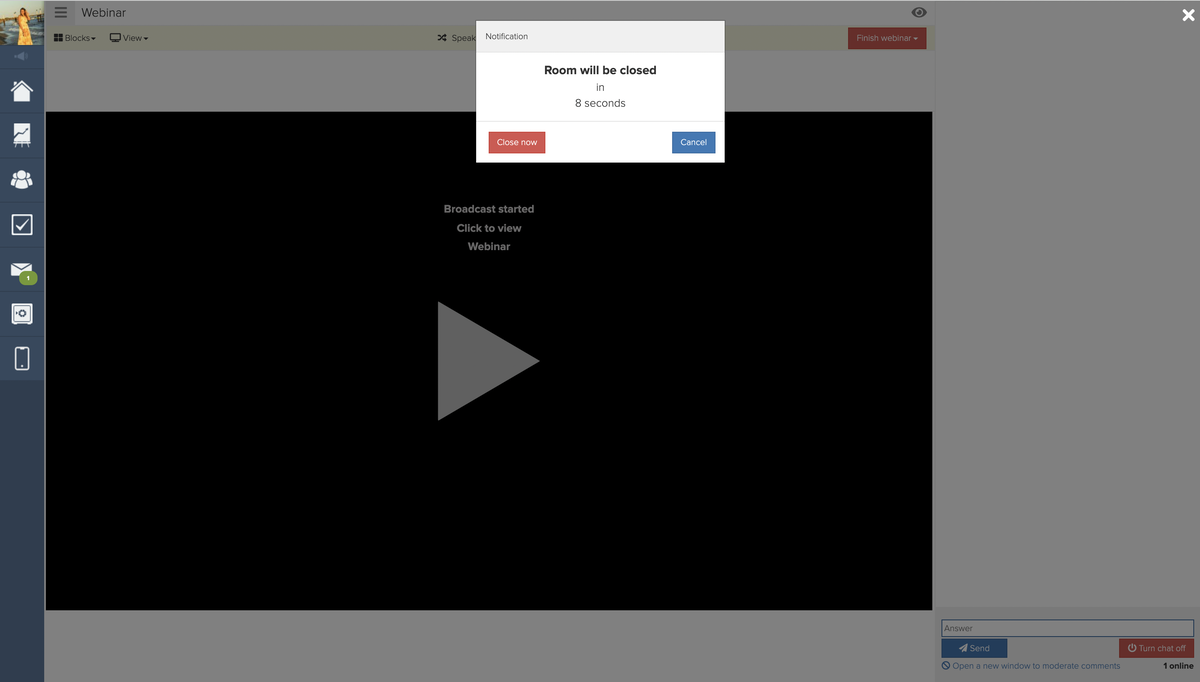
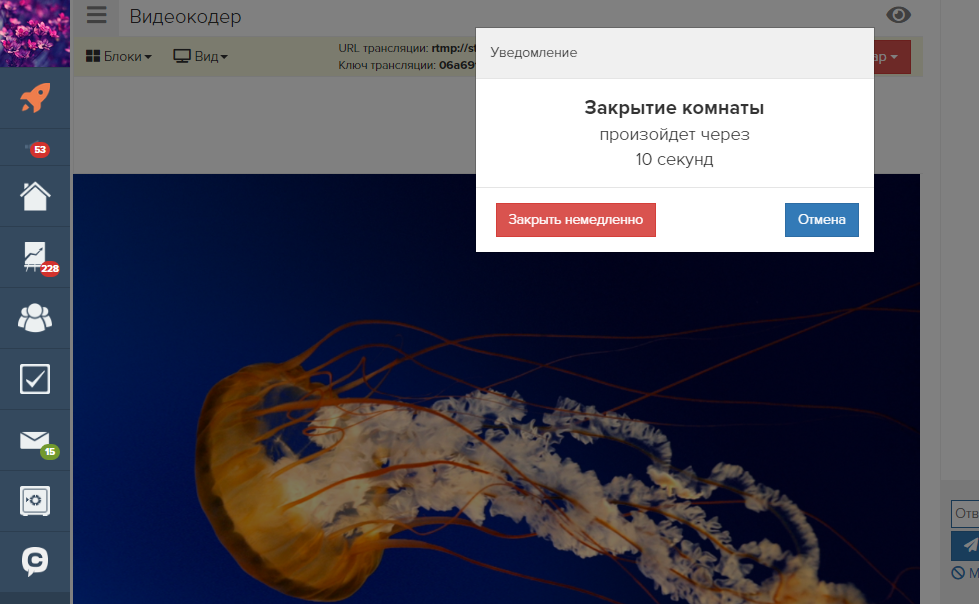
Please note: by default, the room does not close immediately, but after 15 seconds - so that the webinar for the audience does not interrupt halfway, and they see the ending, taking into account the delay
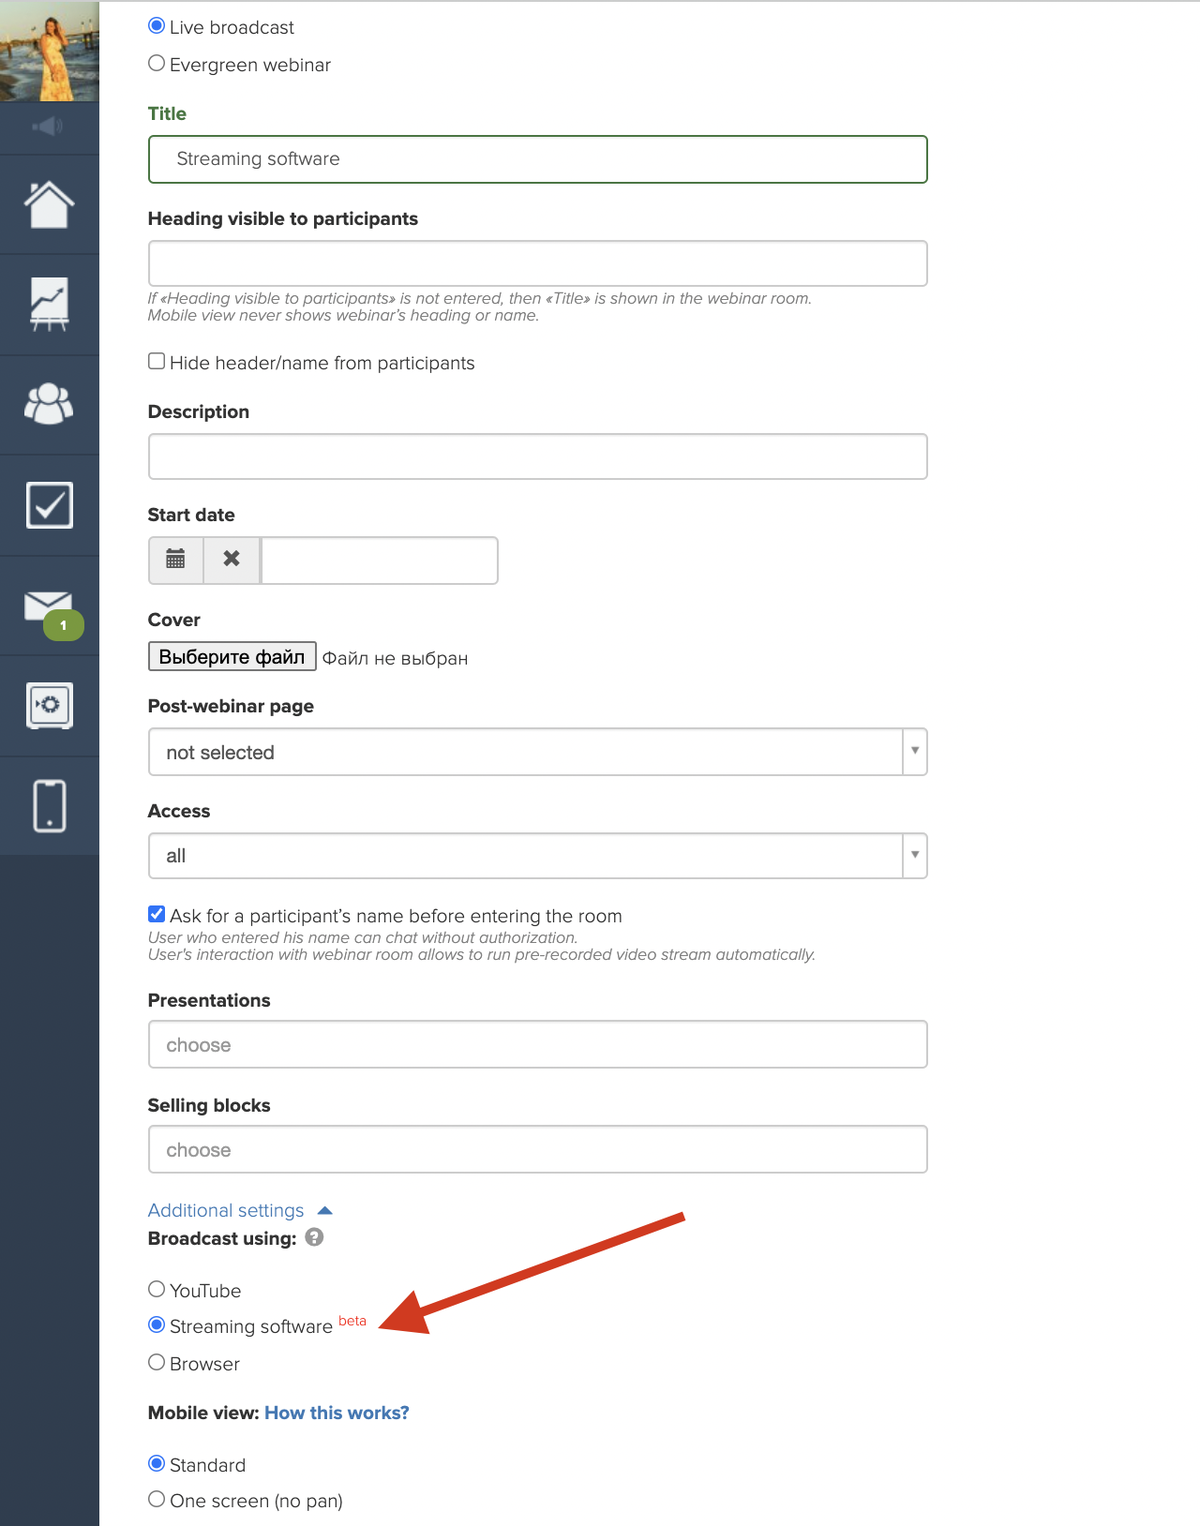
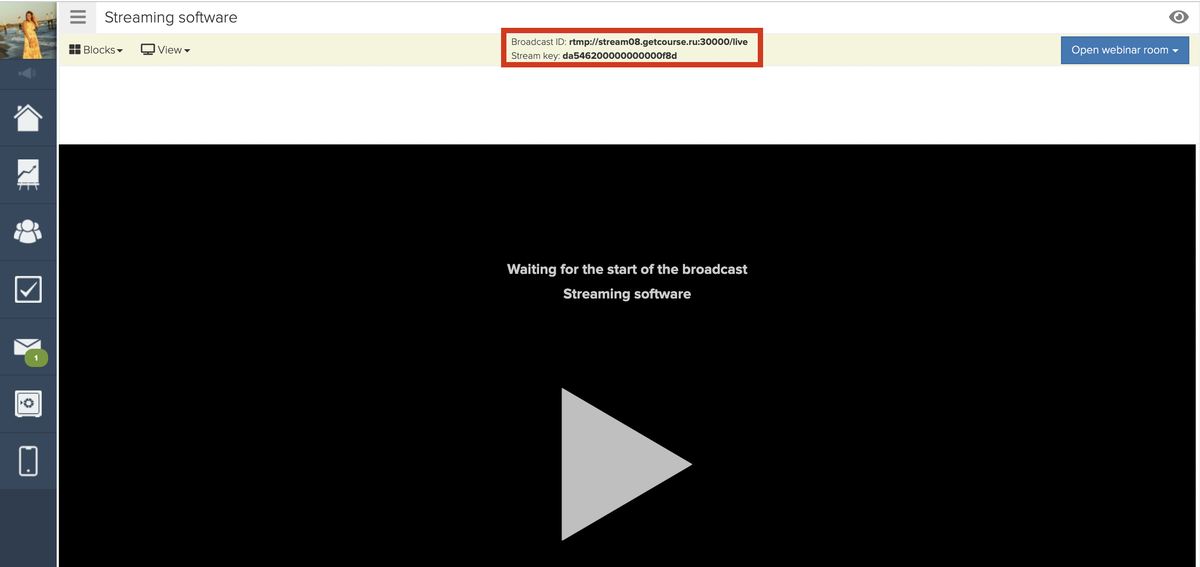
After creating, you will see the URL (server) and broadcast key, with which you can connect a video encoder.
In the OBS settings, in the “Broadcast” section, select “Custom service” and specify the data for connecting the broadcast.
A video encoder provides more options for combining various sources of video stream than a browser.
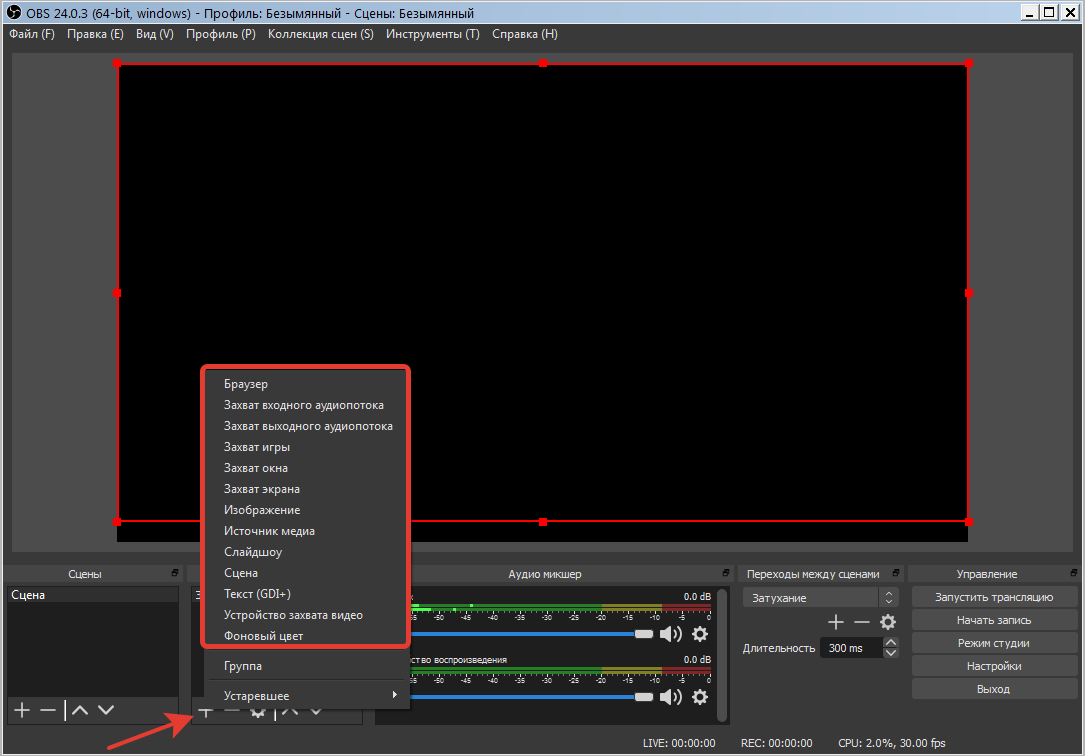
When all the necessary sources and broadcast scenes are configured, run it.
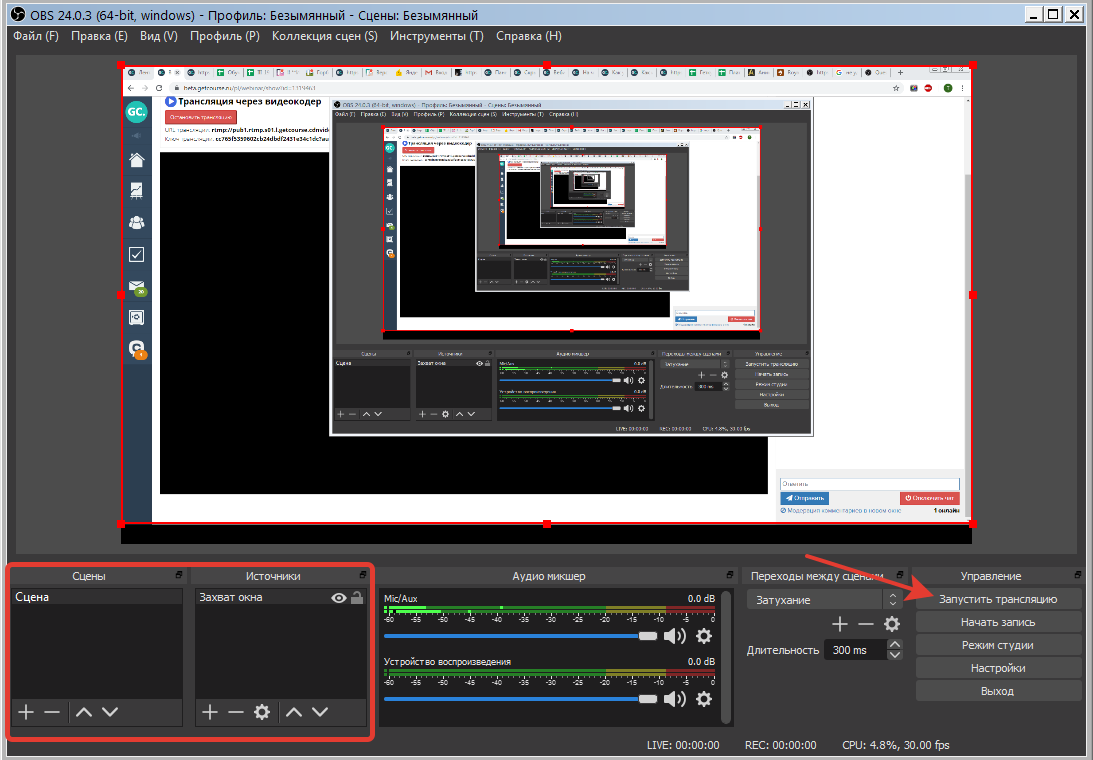
After starting and debugging the broadcast, open the room and start the broadcast for the audience.
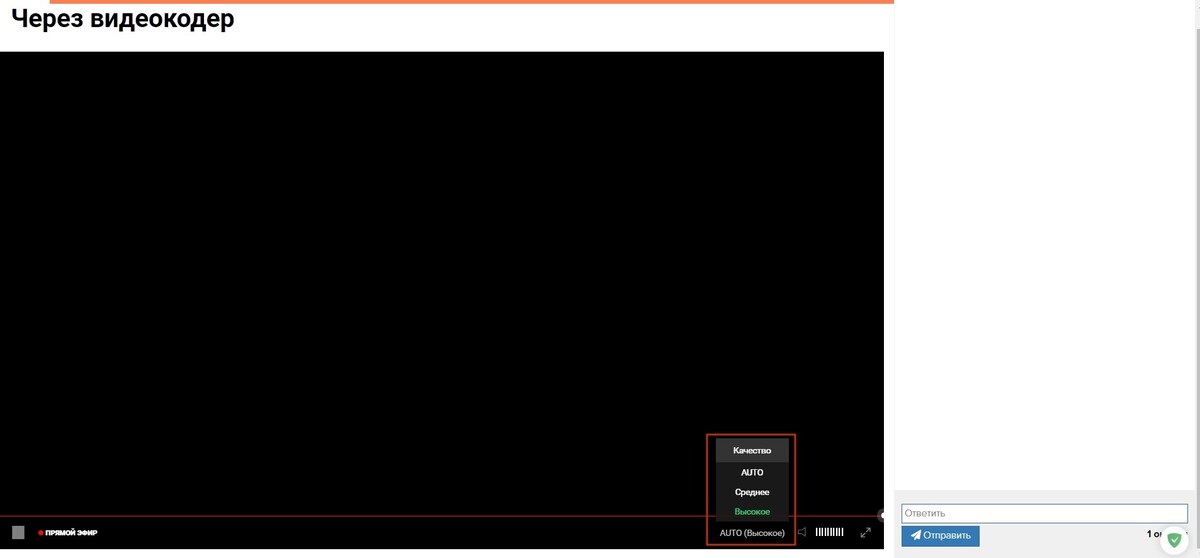
When watching a broadcast, viewers have the opportunity to choose the quality of the video.
If the initial quality of your video is high (bitrate is more than 4000 kbps), then 3 options will be displayed to the viewer:
- High (your video without changing the quality).
- Average (bitrate 2000 kbps).
- Low (bitrate 200 kbps).
If the original video bitrate is less than 4000 kbps, then 2 options will be displayed to the viewer:
- High (your video without changing the quality).
- Medium (200 kbps).
In the “AUTO” mode, the quality is automatically switched based on the user’s available video download speed.
Please note: in some video encoder programs, the bitrate is set not in kilobits (kbit), but in bits (bit). To convert to bits, you need to multiply the above given values by about a thousand.
At the end of the webinar, stop broadcasting and close the room.
Please note: by default, the room does not close immediately, but after 15 seconds - so that the webinar for the audience does not interrupt halfway and they see the ending, taking into account the delay.
After the webinar at GetCourse ends, its script is saved
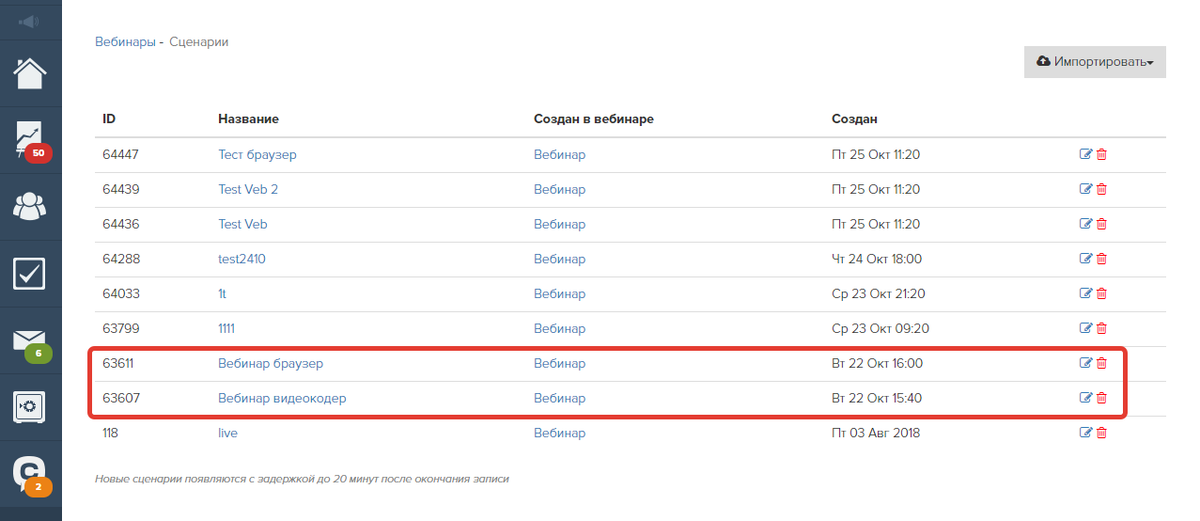
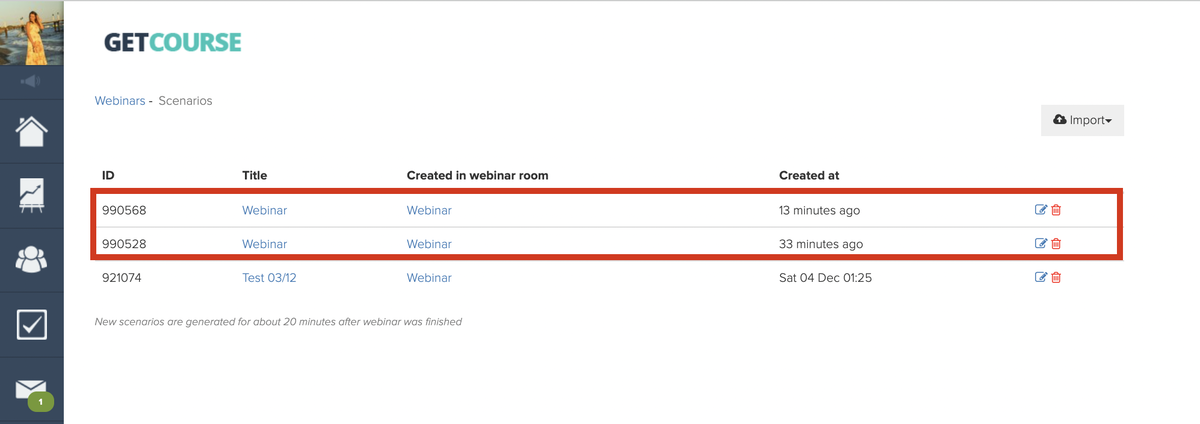
The script stores the actions that were performed during the webinar.
You can use the finished script when creating an auto-webinar in its original form, or adjust it as you see fit by adding or removing actions
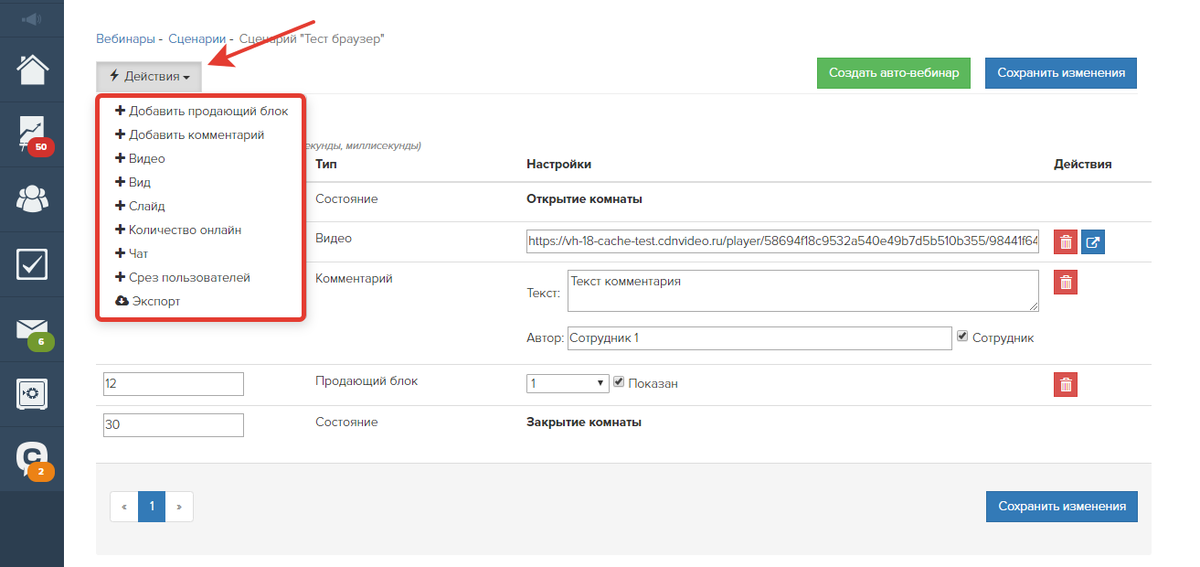

Broadcast video can be downloaded directly from the script by clicking on the appropriate button:
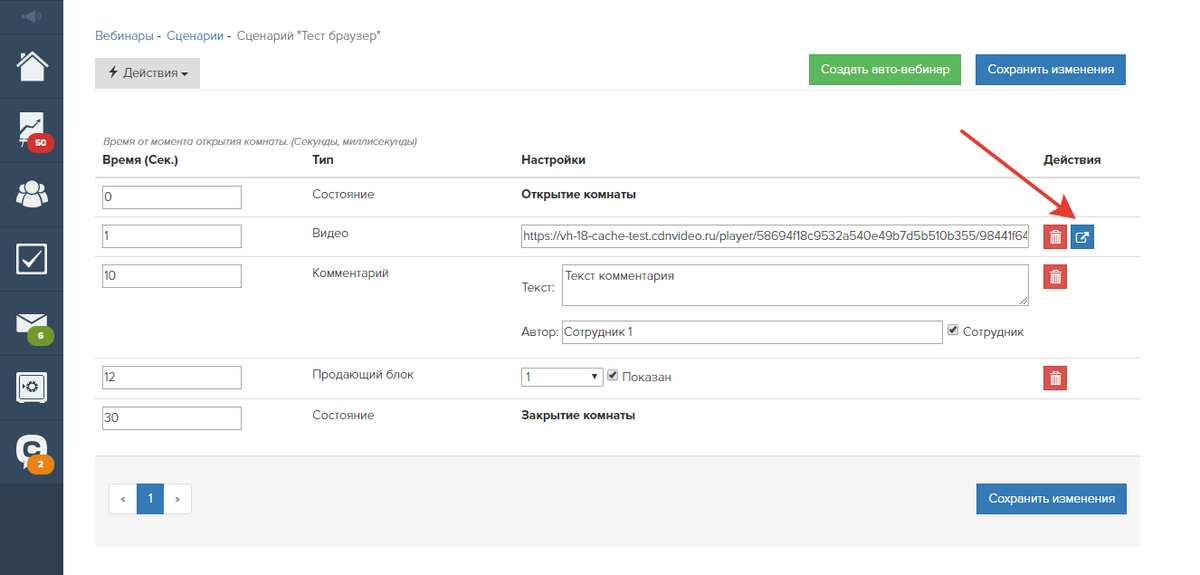
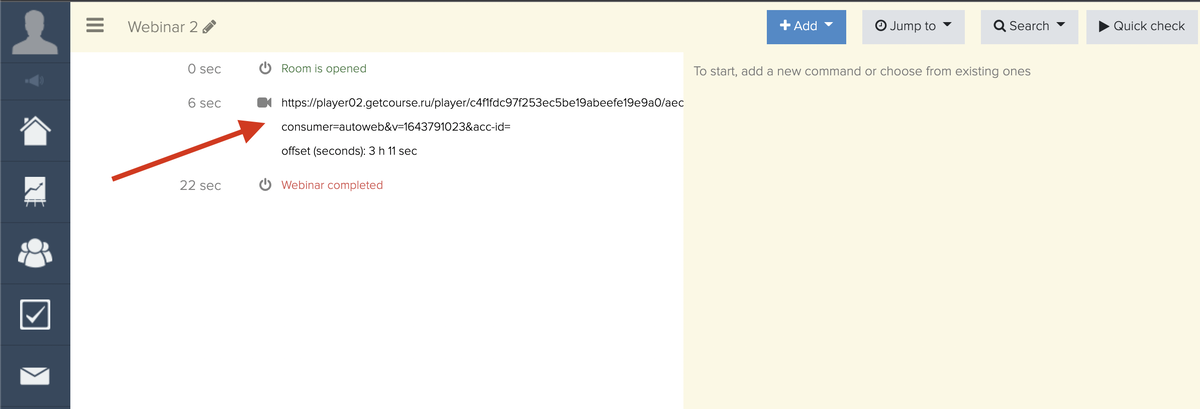
By clicking on the specified button with the left mouse button, you will follow the link to the video in viewing mode and you can download it.
By clicking on the button with the right mouse button, you can download the video without going into viewing mode
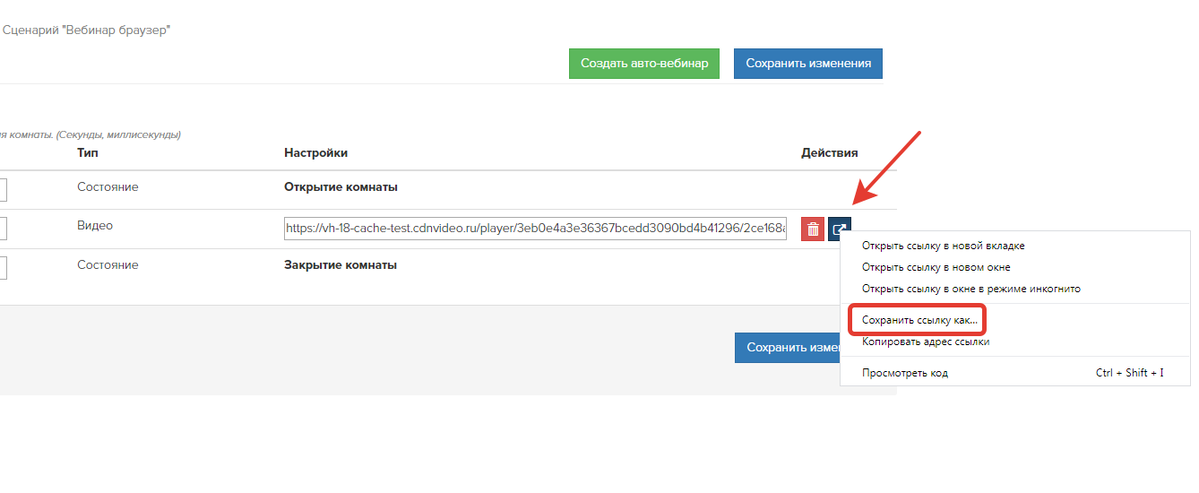
In the script, you see a link to the video and you can download it, while the video file itself is saved in the file storage of your account.
The disk space occupied in the storage depends on the resolution and duration of the broadcast.
Please note: the recording of the broadcast is not instantaneous (it takes time to process the recording).
Depending on the duration of the broadcast, the method of its implementation and the quality of the video stream, the delay can be from several minutes to several hours.
When broadcasting through a browser, the video can be downloaded immediately after the formation of the script.
When broadcasting through a video encoder, the video will be available for download 20 minutes after the formation of the script.
If you plan to broadcast longer than 120 minutes, we recommend that you record additionally with special video capture programs.
The status of records processing can be seen on the “Records” tab in the “Website/Webinars” section.
Please note: Only the video stream broadcast through the browser or through the video encoder will be saved in the video broadcast. At the same time, all broadcast sources demonstrated during the webinar will be included in it - screen demonstration, browser tabs, application windows, and so on.
A webinar room in full is not saved in the video.
If you want selling blocks, presentation slides and webinar chat to be recorded, you can record a webinar with a video capture program when viewed on behalf of the viewer.
We use technology such as cookies on our website to personalize content and ads, provide media features, and analyze our traffic. By using the GetCourse website you agree with our Privacy Policy and Cookies Policy.

please authorize