GetCourse has testing functionality to check the student's knowledge in an automatic mode.
You can:
- use testing in a lesson or on a website page;
- customize single or multiple choice of correct answers to a question;
- use images and videos in questions and answers;
- award points for correct answers and accept the task for the points quantity automatically;
- analyze and download student responses or collect segments of answers for further work.
Testing in the lessons
HOW TO ADD A TESTING AND CUSTOMIZE IT
A testing to a task can be added by:
- administrator
- teacher appointed as main or additional teacher of a course
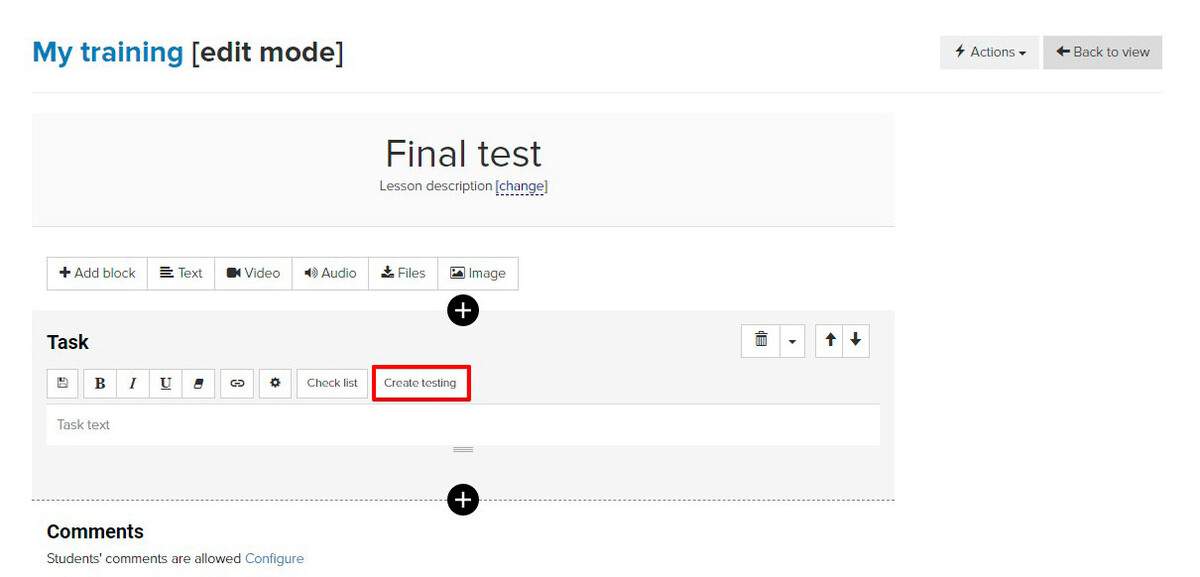
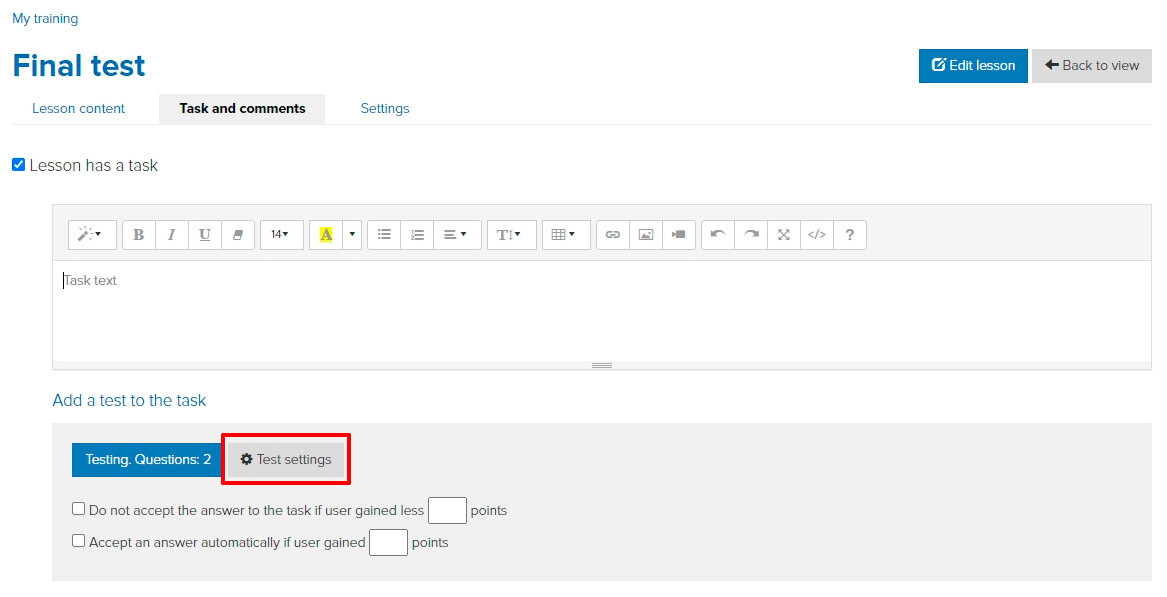
To add testing to the lesson task, click “Create testing” in the task block:
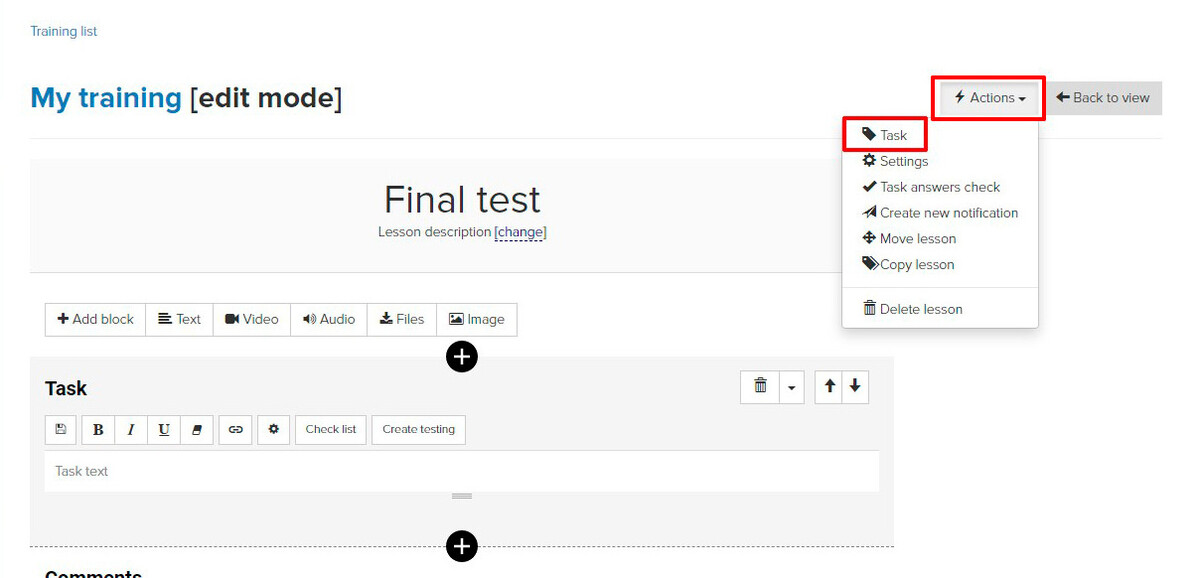
You can also add testing by going to the detailed settings of the task. To do this, click the “Actions” button and select “Task”.
After that click on “Add a test to the task" and “Create testing”.
1. By clicking “Add answer”, add answers to the question.
2. Use the “Add question” button to add new questions.
3. For the question, you can upload a picture for illustration.
4. By clicking on this symbol, you can expand the detailed answer settings and specify which message the user will receive by selecting this option. In addition, you can specify the number of points that will be awarded for choosing this answer.
Check the checkbox on the left for the correct answer.
- A, B and C are correct;
- All answers are correct;
- Only A is true, etc.
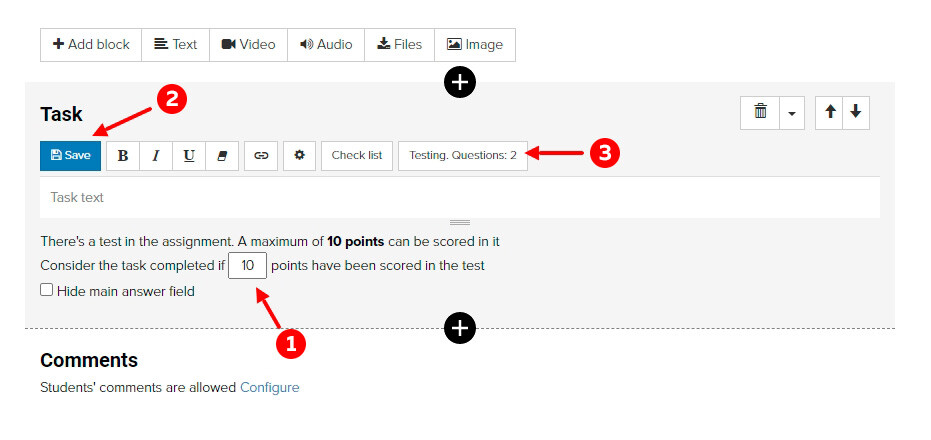
When you edit a lesson with a test added to the task, you can see the maximum score you can obtain by completing this test.
1. You can specify how many points you need to score in testing so that the answer to the task was accepted automatically.
2. Do not forget to save the task after that.
3. Click on the “Testing. Questions” button if you need to add or edit questions.
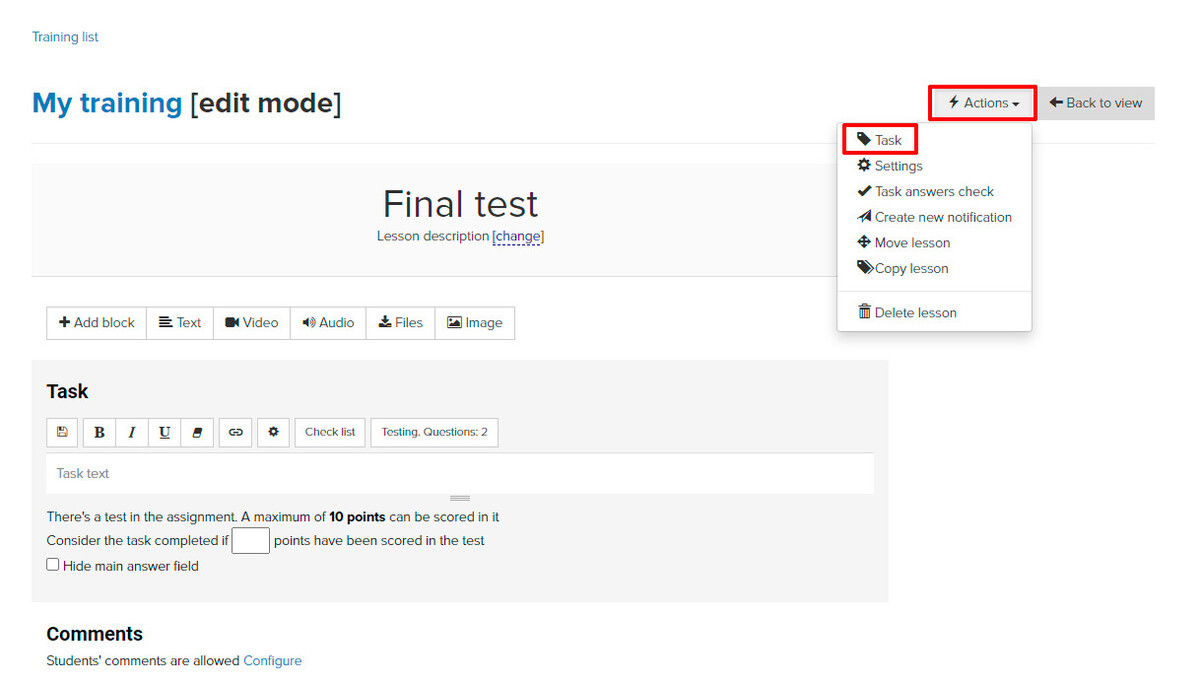
Going to the detailed settings of the task (button “Actions” - “Tasks”), you can open additional test settings.
Here, on the “Settings” tab, you can finalise the test result, which will be presented to the student, add a picture and a title to it.
Here you can also choose what the student will see after each answer and what will be shown as a result at the end of the test.
Pay attention to the option “Student can take the test again after completion”: you can allow students to re-test. They will be able to repeat the test only before they send an answer to the task.
On the “Answer groups ranges” tab, you can customize messages that will be shown to the user along with the result, depending on the score range obtained. To do this, set the number of points “from” and “to” and enter the message text.
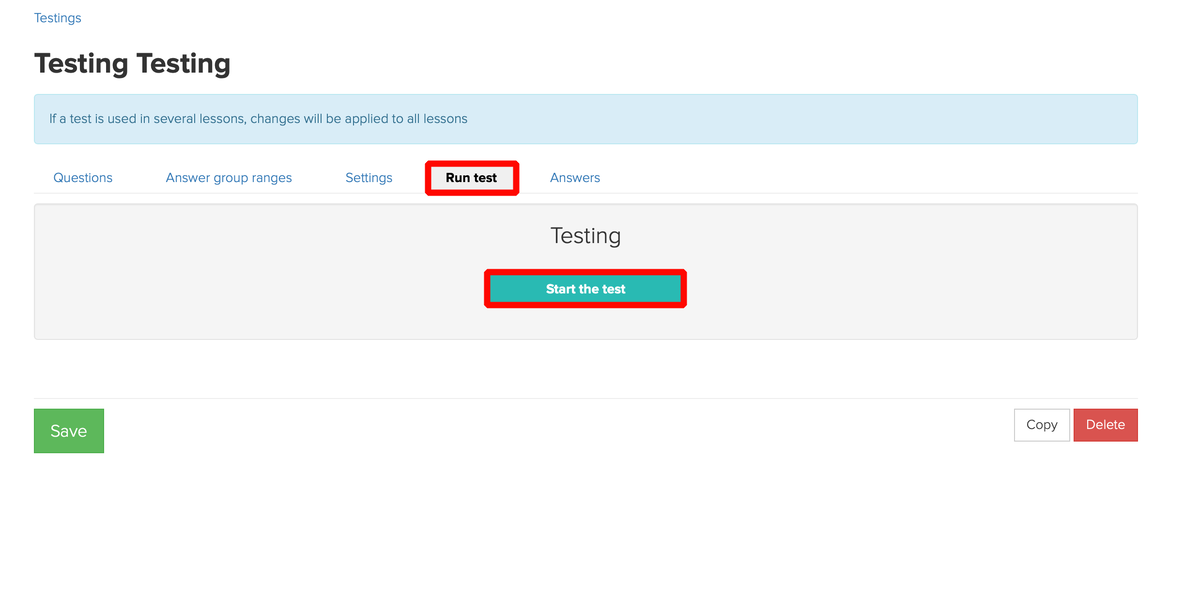
On the “Run test” tab, you can take a test to check whether it works.
Testing on website pages
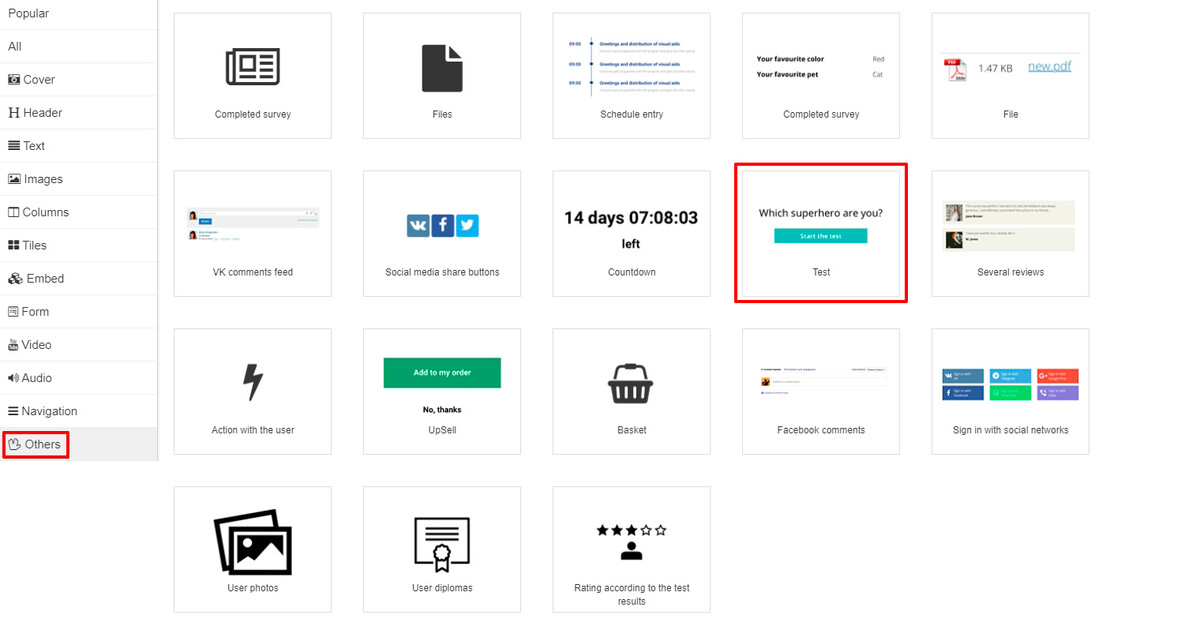
You can add testing to the website page, there is a special “Testing” block in the “Other” section for this.
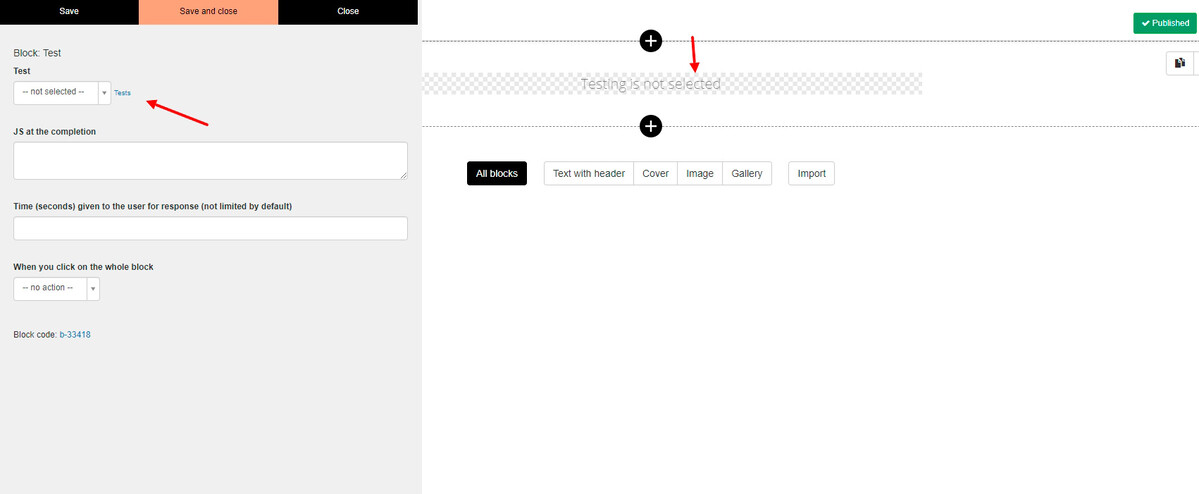
In the block settings, you can choose a preset test from those that have already been saved in the “Training” - “Testing” section, or create a new one by clicking on the “Testing” link.
Click “Create test” and enter a test name and its description. You can also set the title, font color, and background image for displaying the result.
After that you can add questions to the test.

Having saved the testing, you can select it on the website page in the block settings.
Analysis of student responses
On this page, you can:
- Go to a specific user response by clicking on the ID;
- View users who have been tested and go to their profile;
- View the date when the response was created;
- Go to the settings of a specific test.
- Located in a segment - you can select a previously formed response segment. You can save and delete segments.
- Date of completion (response creation) — you can select responses that were created during a certain period of time.
- Scored points — you can select the answers within which a certain number of points were scored.
- Belongs to the user - the condition will select all the user's responses with certain parameters (using this condition, you can add the necessary conditions for users to the selection, for more information, see the article "Segments by users").
- Status - you can select completed or incomplete responses.
- Testing — it is possible to choose answers that relate to a specific test.
You can also export the responses in a CSV — file.
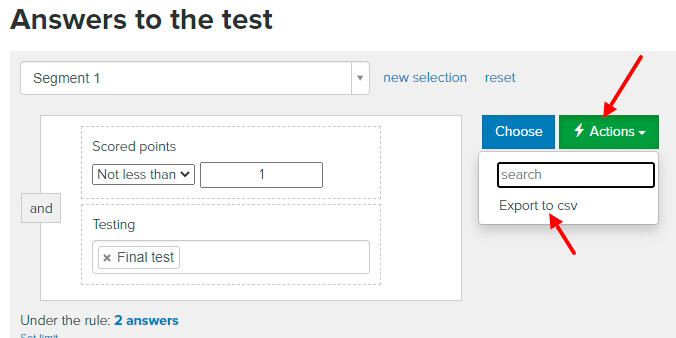
When exporting responses, the following fields and their values are unloaded:
1. Response ID;
2. User ID;
3. User Name;
4. E-mail;
5. Name of the test;
6. Question;
7. Answer;
8. Status;
9. Points;
10. Date of creation;
11. Lesson.

When you click on the response ID or user name, you will be redirected to the profile of the selected user on the "Testing" tab in both cases.
However, when you click on the response ID, information about the user's specific response in the test will immediately open. When you click on the user's name, information about all the user's responses in this test will open.
When analyzing a student's response, you can find out:
— When the response was created;
— Testing status;
— Which questions did the user answer correctly (green) or incorrectly (red);
— The number of points scored.
If you need to view the answers to the tests of a particular student, you can go to the "Testing" tab in the user profile.
Users have access to the testing settings and the answers page:
— Administrators;
— Employees assigned as additional or primary teachers in any training.
We use technology such as cookies on our website to personalize content and ads, provide media features, and analyze our traffic. By using the GetCourse website you agree with our Privacy Policy and Cookies Policy.

please authorize