After registration you need to do the following:
- To set up your account (project name, logo, domain, email, payment systems).
- To create and set up a training (to adjust a structure, types of lessons, script of lessons passing, ways of access opening).
- To set up a training sales (to create a product, an offer, to envisage discounts, to set the period for access to a training).
- To link a training sale with a landing (to choose ways of allocation, to choose blocks).
- To import users (how to import of the existent base, how to set up a welcome letter sending).
- To set up mailings (thank you for purchase + a link to a purchased training).
- To organize a work in a training (communication with students, task receiving, webinars hosting).
1. Account settings
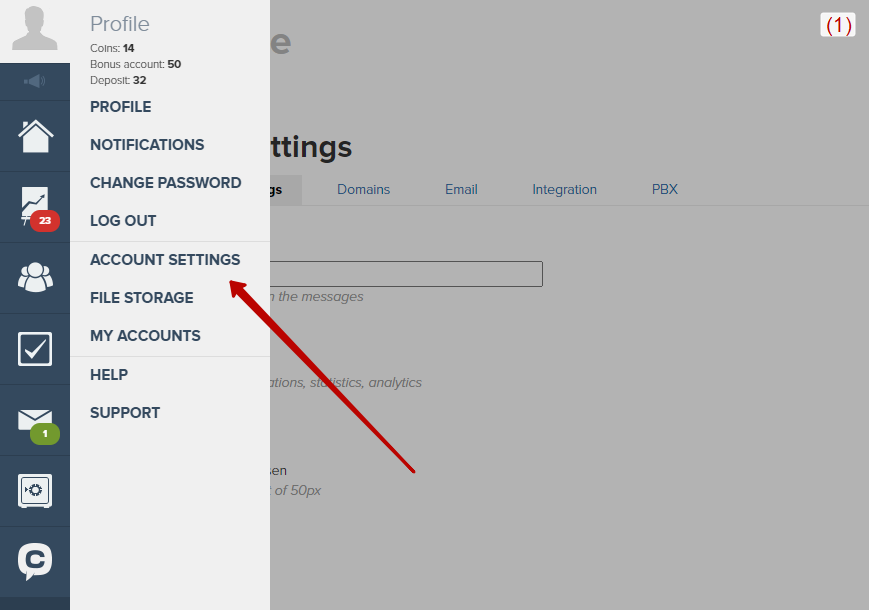
Important settings for your account are located in the "Profile" - "Account settings" section of the menu (1). By default, only the account owner has access to this section. How to grant access to account settings to administrators - in the article.
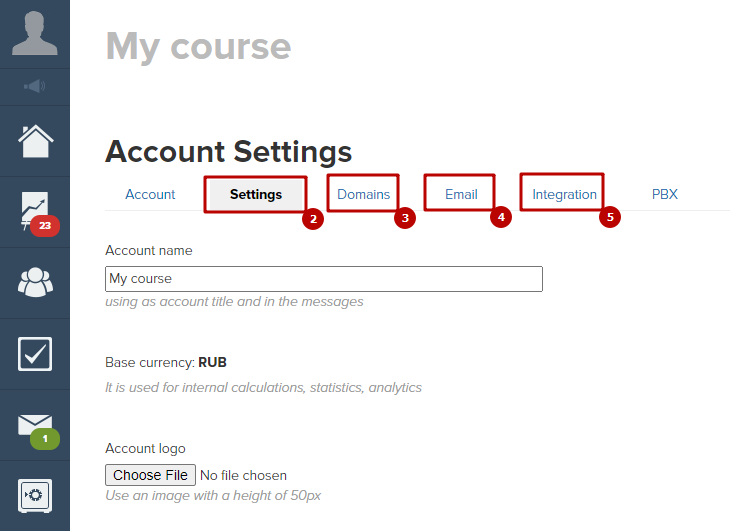
Next, go to the "Settings" tab and specify the name of the project (it will be substituted in the "From" field in outgoing letters), load the logo and favicon (2).
In the "Domains" tab, you can connect your domain to use (3). If you have your own website and do not plan to transfer your domain to GetCourse, then you can connect your account to a subdomain. You can read more about connecting a domain or subdomain in the article.
Mail setup (4) is inextricably linked with the domain. Until your own domain / subdomain is connected and outgoing mail is not configured, letters are sent on behalf of the Getkurs platform with a limit of no more than 50 letters per mailing. You can read about setting up mail in the article.
In the "Integration" tab (5) you can connect payment systems.
2. Training creation and setting up
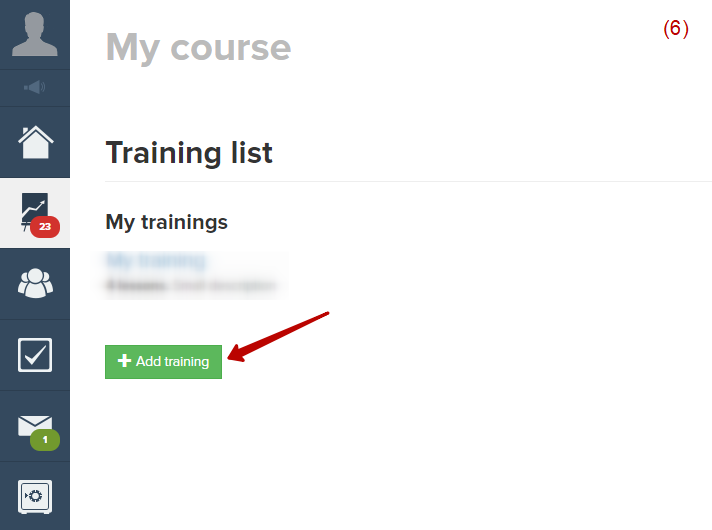
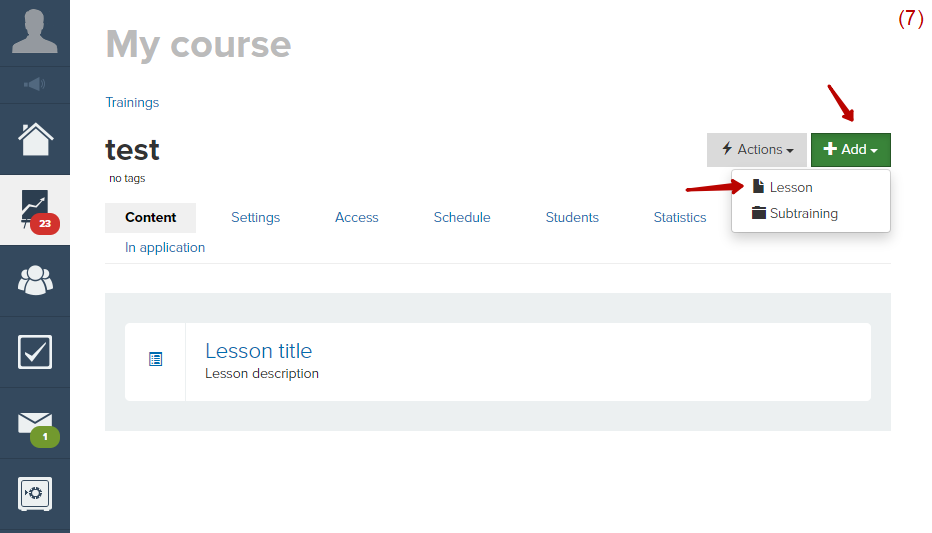
The next step is to add a training (6). Training accommodates lessons. You can sell access to the whole training or to a selected group of lessons with the using of “Test-drive” option. In training settings it is possible to change a name and description of a training, assign responsible teachers and adjust elements of gamification: achievement scale, badges, certificates. You also can turn on an auto issuing of certificates.
You can use and combine the following types of learning content in lessons: webinar, text, video, audio, tests. It is possible to indicate a timing in lesson’s settings - it will be depicted in a schedule. Read more about setting of an individual schedule.
You also can change a training design: add banners, buttons, video or text messages.
3. Setting up a training sale
You can set up an auto access opening to a training for a user, who just purchased it. Do the following:
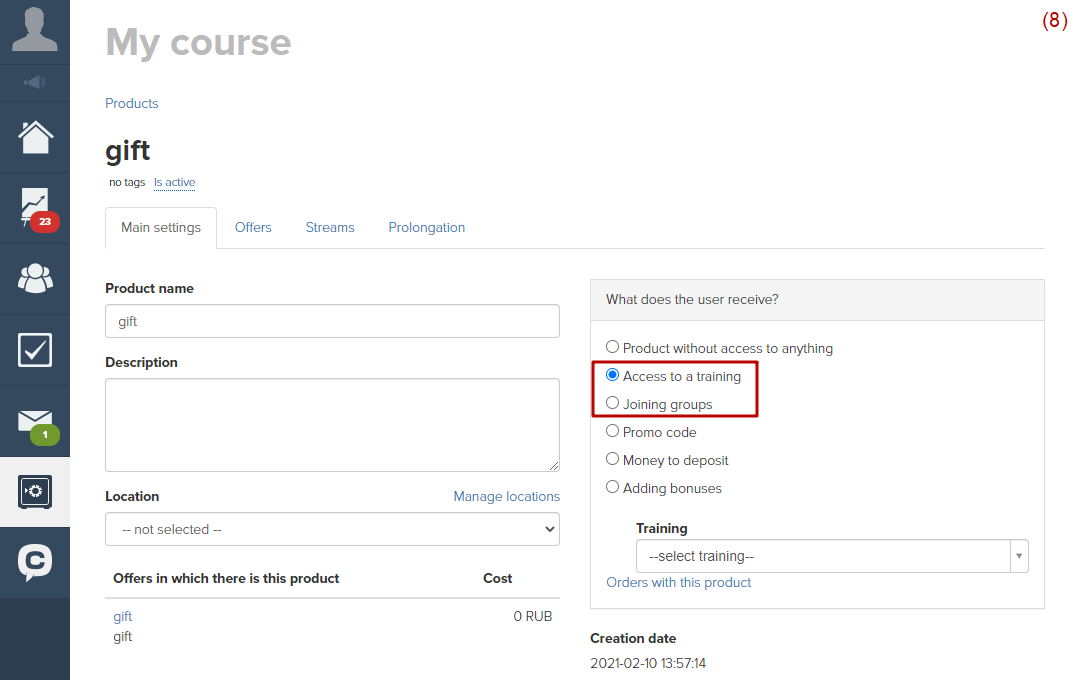
- Create a product and note there, that after purchasing a user gets access to a training (it is possible to sell offline courser via GetGourse as well, then after purchasing the user can be added to a group via which you can send him a letter with a ticket).
- Create an offer and indicate a price there. It is possible to add several offers to one product, i.e. to create a price range: “Economy”, “Standard”, “VIP” packages. Let’s suppose a user gets access to a training for a certain period of time if he uses “Economy” package, however “Standard” package includes a feedback from a teacher, homework revision and secret chat with other students. You can find more opportunities in the article on specific training settings. For instance, you’re able to open selective access for tasks, to forbid looking through answers of other students, to define the term during which access is provided, etc. You can sell several products via one offer - either trainings or bonuses. For example, a training and a record of a tutorial webinar.
Thus, you can open access to a training upon purchasing or add a user to a group firstly and then to add access to a whole group. Notice! It is possible to edit specific training settings only if you need to open access to a training upon purchasing (8).
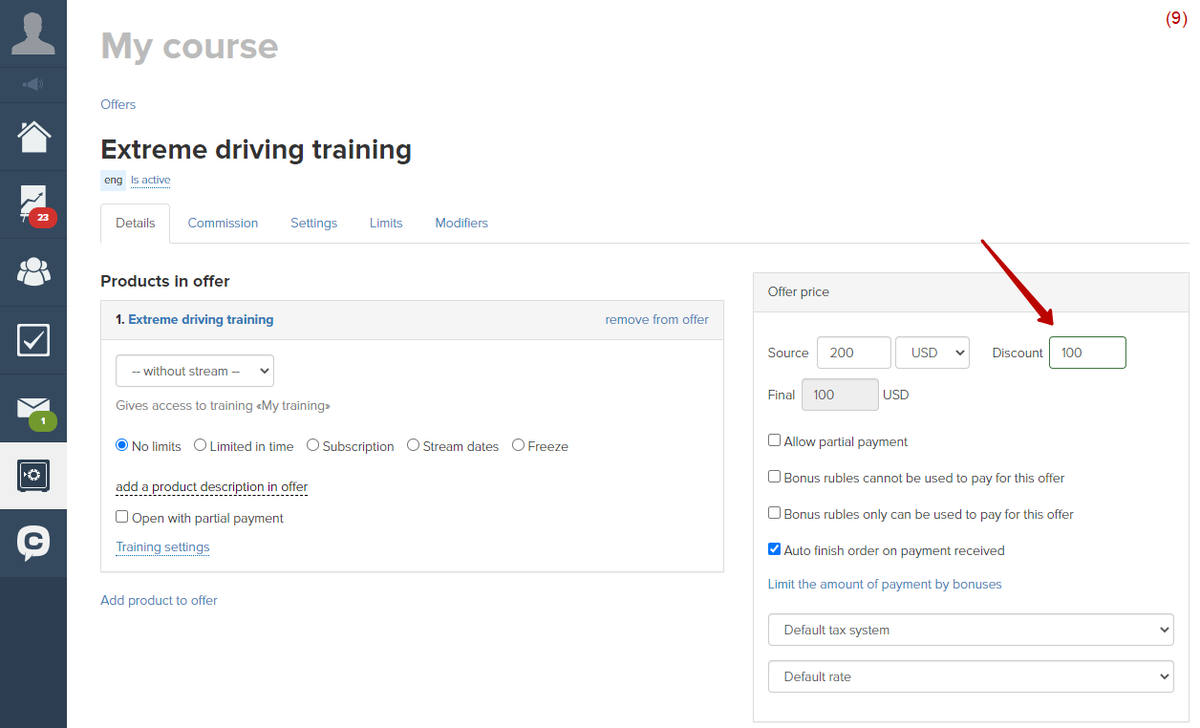
It is possible to envisage a discount in the offer. For instance, you can offer it to users who purchased access to a training before others. You also can add visual effects with a strikethrough price. To do it indicate a discount in offer’s settings (9).
4. Linking of training sale onto a landing
It is possible to set a displaying of a created offer on your website - on a landing and via widgets.
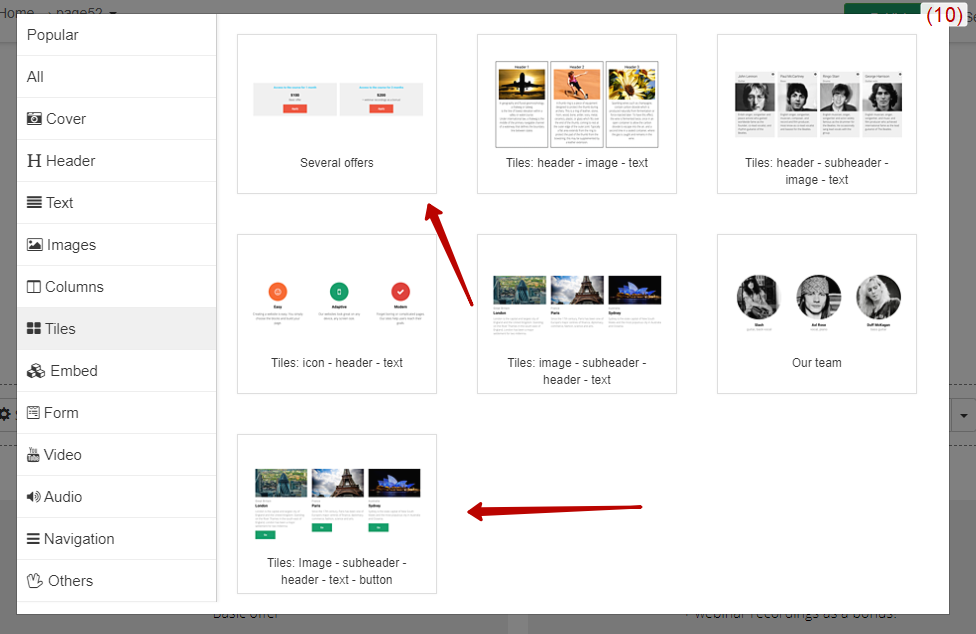
There are dedicated blocks of a page constructor to allocate the offer on a landing (10):
- “Tile - Several offers” (classic columns with comparison of plans);
- “Image - Sub-title - Title - Text - Button”;
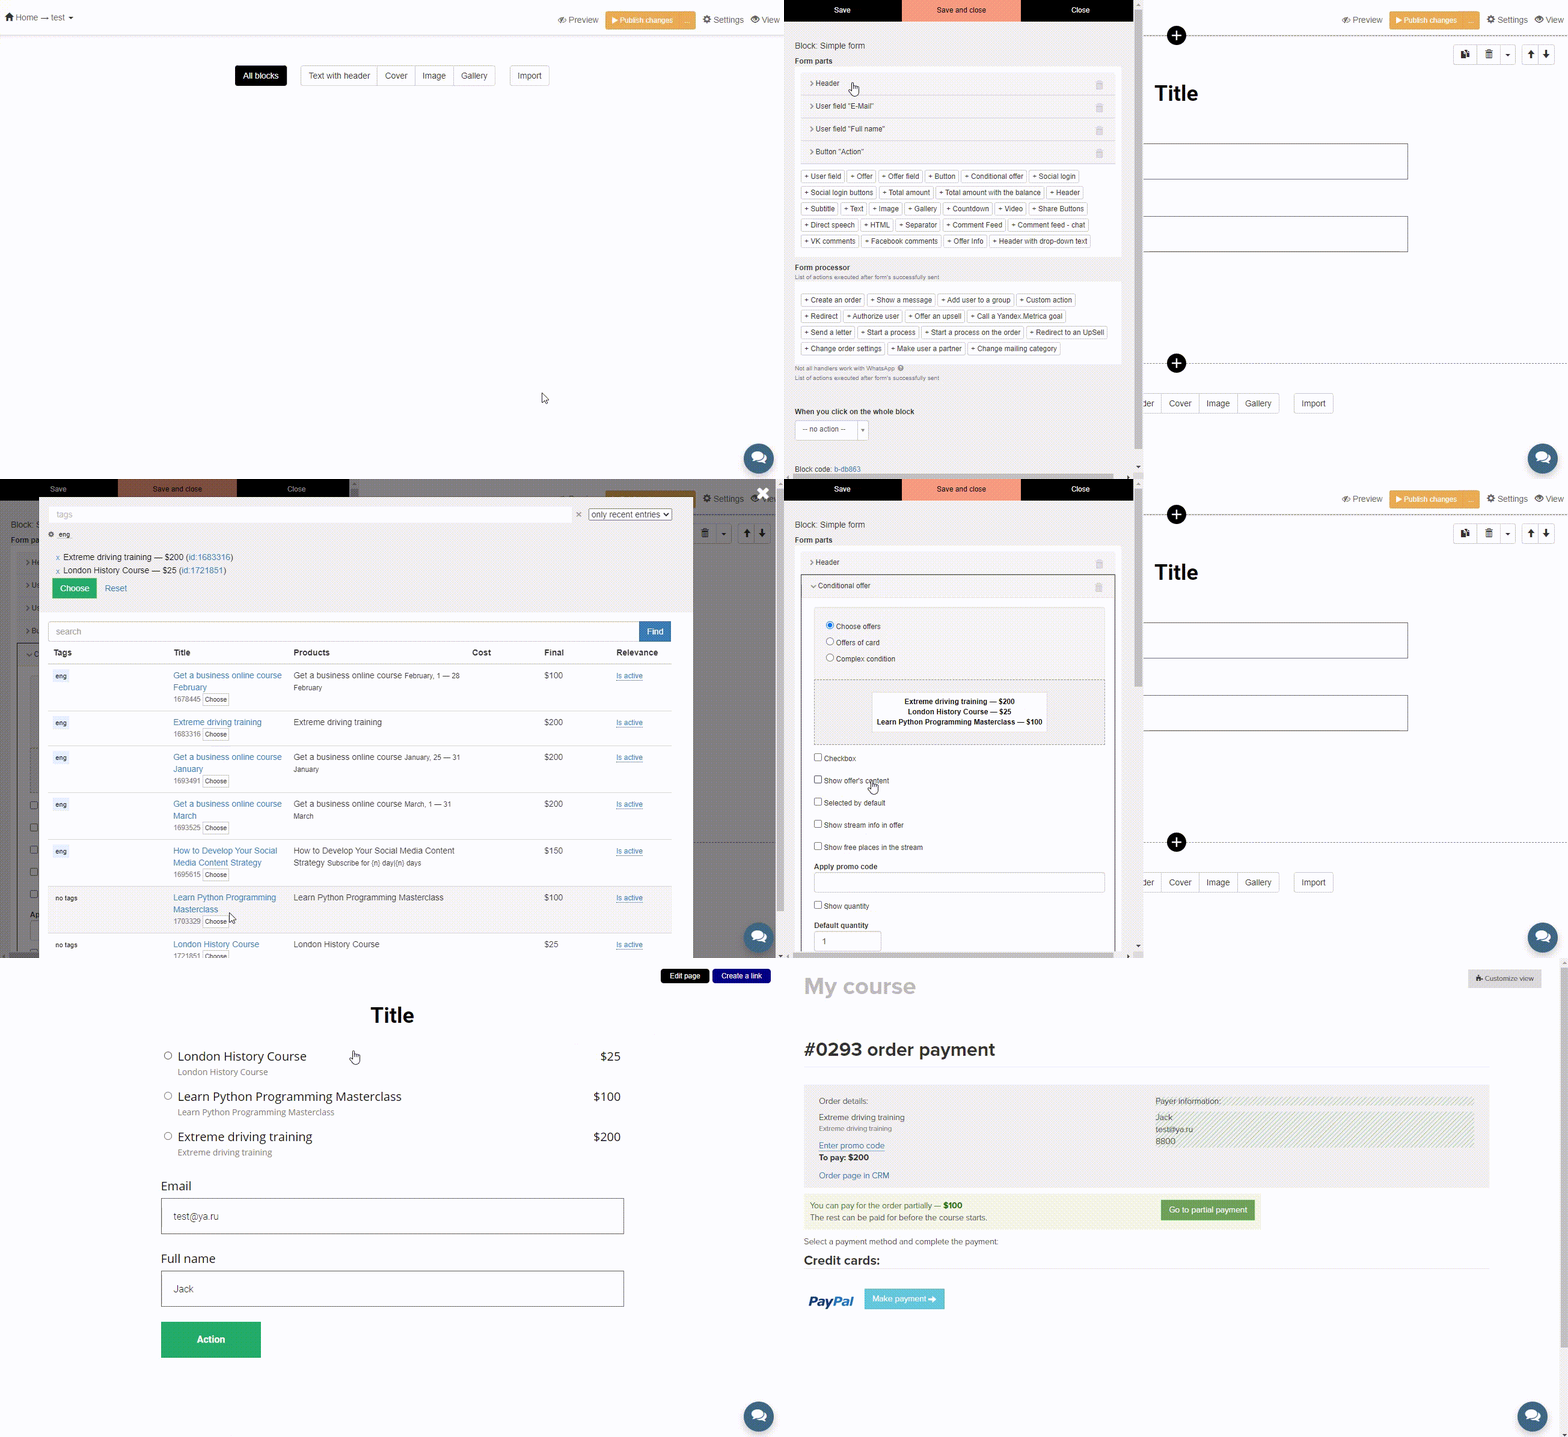
- “Regular form”.
In order to show an offer on training sale with the help of widgets it is needed to create and set up a widget itself. A prepared widget can be allocated in different parts of a website, i.e. inside a training (if you sell partial access after test-drive or offer the next step in studying).
- Using “Tile - Several offers” block (use “Filled in manually”)

- Using “Image - Sub-title - Title - Text - Button” block

- Using “Regular form” block
5. Users’ import
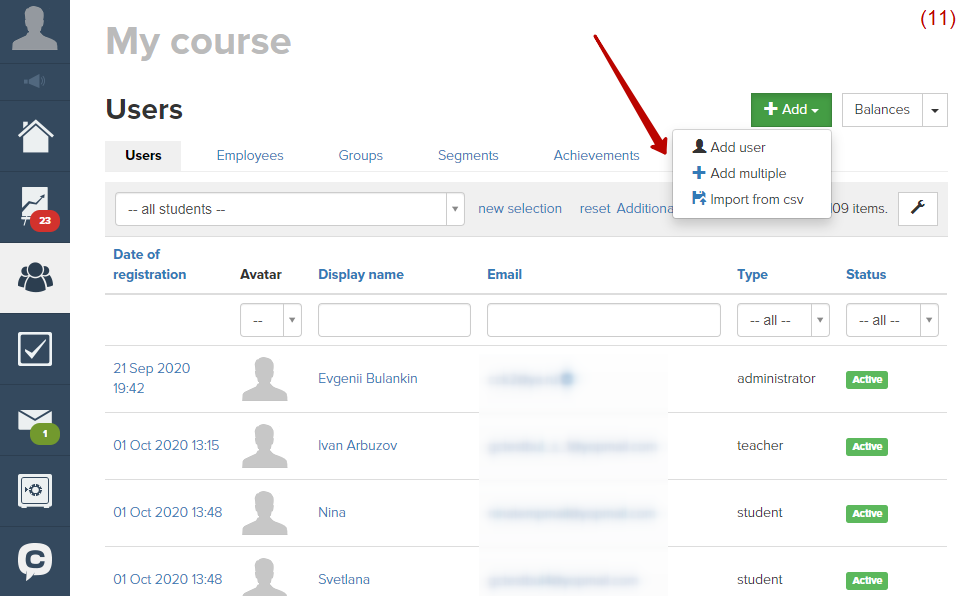
If you already have a base of users, you can import it to the GetCourse system either manually one by one or in bulk via CSV-file uploading (11).
To let the system letter with login and password be sent to users after their registration or import, it is needed to turn on a relevant option.
6. Mailing setting up
In order to create mailings you need to set up an email.
- payment reminder,
- letter sent after purchase (with a link to a training).
When creating mailings it is possible to use Text editor or Templates.
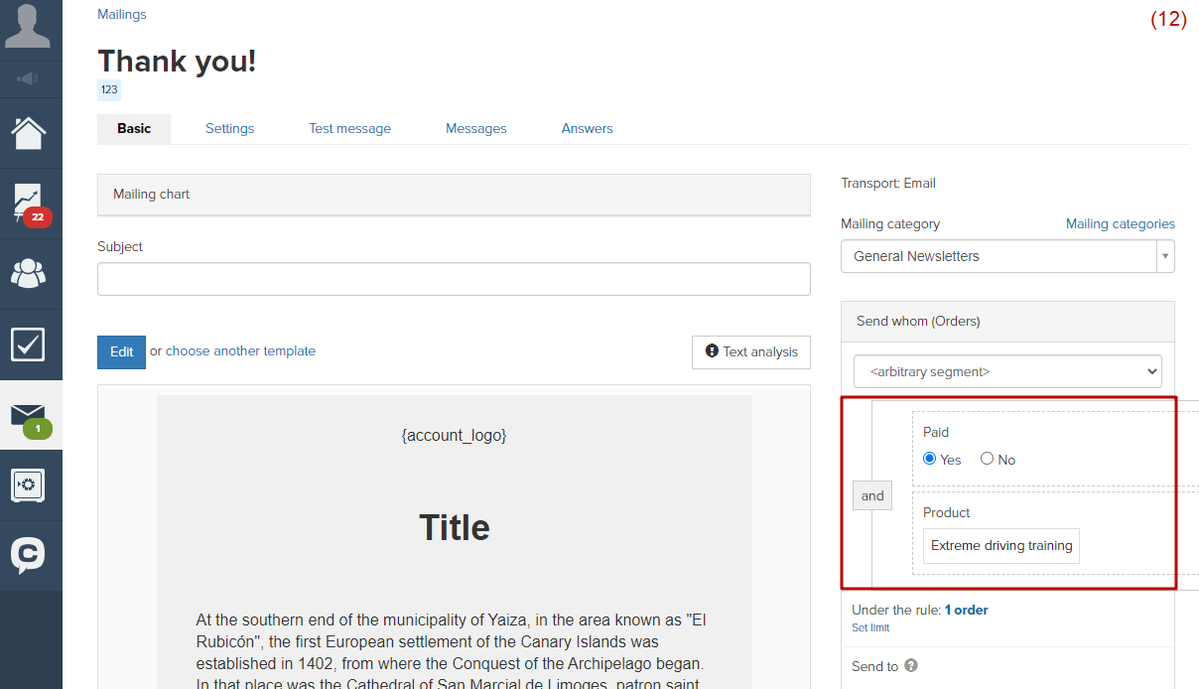
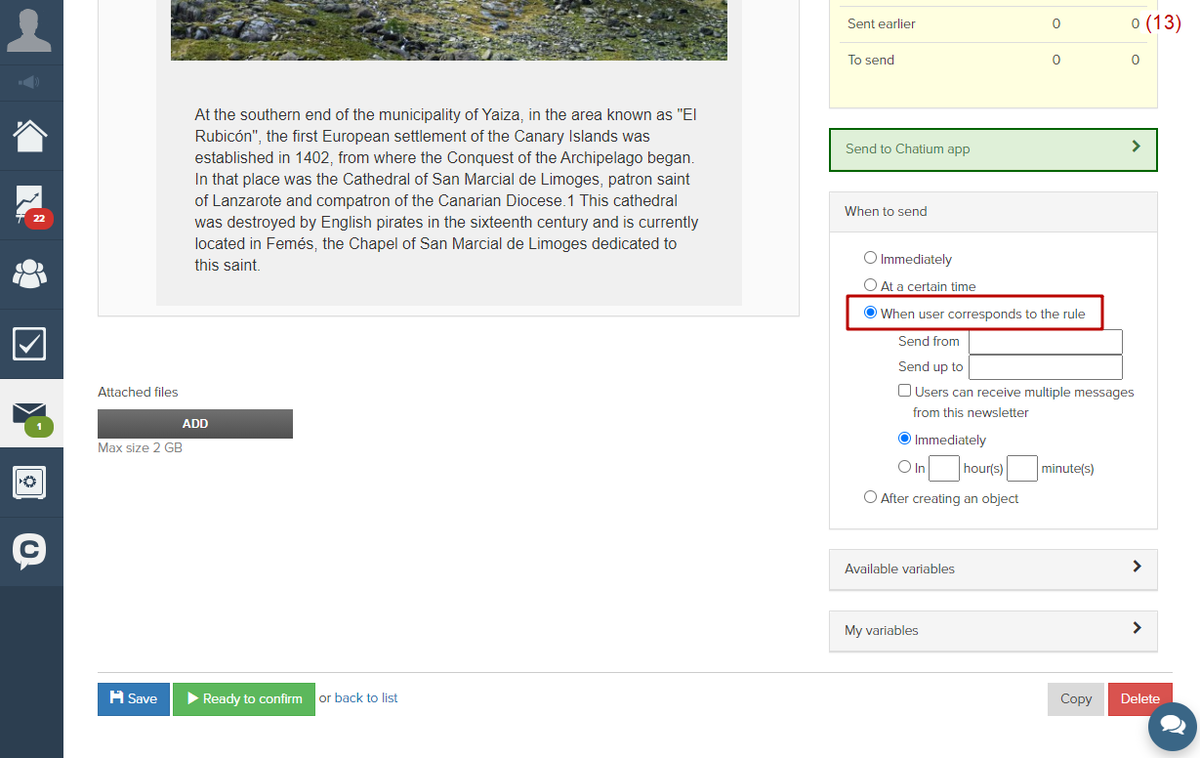
Let’s take a look at the example of settings of a letter being sent to a user after he purchased a training. Firstly create a mailing “By orders” and choose a segment of users who will receive this letter, - “Order is purchased” (12). Choose “When a user meets a rule” in “When to send” field (13). If to select this condition, letters will be sent to every user, who purchases a product defined in settings.
You can launch a mailing by clicking on “Ready to be sent” button. A mailing will be in “Waiting for subscribers” status. Once a user purchases a product, he will receive a letter.
How to create a mailing

7. Work in training
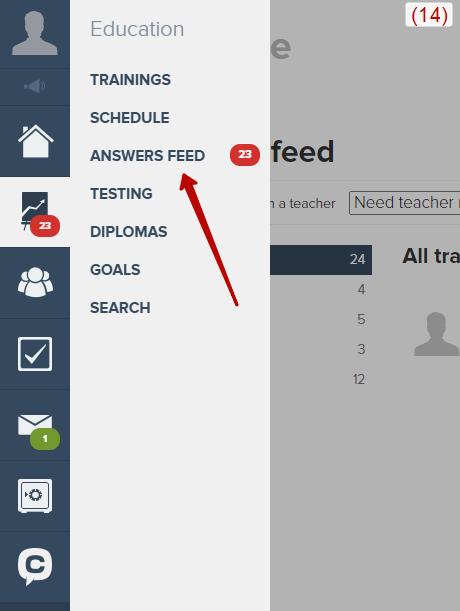
Use “Answer feed” in order to work with students’ answers (14). It is possible to assign a responsible teacher for a group of students in GetCourse.
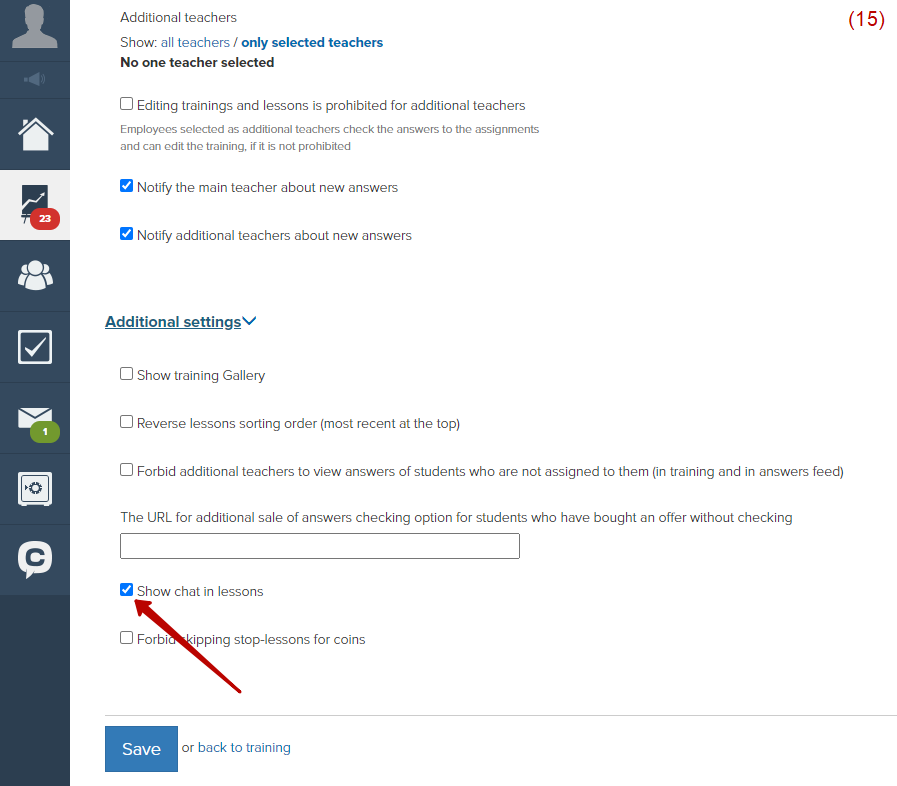
All communications between students are possible either via comments to lessons or in a through common chat, which is available in all lessons. You can turn it on in training settings (15).
We use technology such as cookies on our website to personalize content and ads, provide media features, and analyze our traffic. By using the GetCourse website you agree with our Privacy Policy and Cookies Policy.

please authorize